Showing posts with label Breads. Show all posts

Thursday, August 4, 2011

Whole Wheat Bagels version 1


Please visit our new site at www.CookingMyWay.com


(They tasted better than this photo makes them out to be!)

This recipe is to be made in a KitchenAid type stand mixer...

1.5 Cups AP Flour
2 Packets Active dry yeast (5 tsp of yeast if you buy in bulk)
1.5 Cups Water, at 110 F
3 Tbsp Sugar
1 Tbsp Salt

3 Cups Flour (1 Cup AP, 2 Cups unbleached white Whole Wheat)

1 Gallon Water
1 Tbsp Baking soda


In your mixing bowl add the 1.5 cups flour and yeast. Dissolve the sugar and salt in the 110F water then pour over the flour and yeast. Beat at low speed for 30 seconds, scrape down the sides of the bowl. Beat for 3 minutes on high speed.
Add the rest of the flour and mix on a medium low speed until incorporated. Let the mixer knead the dough for 4-5 minutes until you get a moderately stiff dough. You might have to add a bit more flour - maybe a few tablespoons. you don't want it to be overly sticky. It will end up being smooth and elastic. Turn out onto a lightly floured surface, cover and allow to rest for fifteen minutes.
Cut into twelve portions - try not to totally flatten out the dough too much. Shape into smooth balls. Punch a hole in the middle of each with a floured finger, and pull gently to enlarge hole to about two inches. You really want a big hole in the middle because the hole will become much smaller as the dough proofs. Place on a greased baking sheet; cover; and allow to rise for twenty minutes.


Broil five inches from heat for about 90 seconds on each side.

Bring 1 gallon water and 1 tablespoon baking soda to boiling; then reduce heat. Boil the bagels a few at a time, for 6 minutes, turning once in the middle. Drain and place on greased baking sheet.


Bake at 500F for 5 minutes, then reduce the heat to 450F and bake for 5 more minutes. Remove from pans and move to a wire rack to cool. Eat & Enjoy!
Happy Baking,
~Nikko
--

Sorry no video for this one - will do one next time I make them!

Monday, July 25, 2011

Cheese Danish Recipe


Please visit our new site at www.CookingMyWay.com


So we were on vacation in Clearwater Florida and went to Lenny's for breakfast one morning. Lenny's is known for their breakfasts and some would say the best breakfast available in Florida (or the world). The best part about the breakfast is that you are treated to a nice basket of homemade pastries when you order your food! OMG they are delicious! One of the pastries in our basket was a cheese danish. I decided it was about time for me to try my hand at making them so I went to Ina Garten (she's my go to when it comes to sweets) and got a recipe. I adapted this version a bit from hers...

8 Oz. Cream cheese, at room temp (that's one large box)
1/3 Cup + 2 Tbsp Sugar
2 Extra-Large Egg Yolks, at room temp
2 Tbsp Ricotta cheese
1 tsp Vanilla extract
1/4 tsp kosher salt
1 Tbsp Lemon zest, grated (about 2 lemons) you can use Penzey's lemon zest reconstituted
2 Puff pastry sheets, defrosted
1 Egg beaten with 1 Tbsp water

Put the cream cheese and sugar in a bowl and cream them together gently until smooth. You do not want to do a fast whip on anything here! You can use a mixer to do this or by hand. Once they are creamed nicely, add the egg yolks, ricotta, vanilla, salt, and lemon zest and mix just until combined - do not over work the mixture.

Unfold one sheet of the puff pastry onto a lightly floured surface and roll it out slightly with a floured rolling pin until it's a 10" x 10" square. Cut the sheet into quarters with a knife. Place a heaping tablespoon of the filling into the middle of each square. Brush the border of each square with the egg wash and fold 2 opposite corners to the center - overlap the fold a bit and pinch together well. Brush the top of the pastry with the egg wash. Repeat this step with the remaining pastry sheets. Place the pastries on a parchment lined sheet pan and refrigerate for 20-30 minutes.

While the pastry is in the refer, preheat your oven to 400 degrees F.

Bake the pastries for about 20 minutes, rotating the pan once during baking, until puffed and brown. Eat & Enjoy!

Happy Banking!

~Nikko

--

Video coming soon!


Sunday, December 12, 2010

English Muffins The CIA Way


This recipe comes from the acclaimed CIA... It's a pretty easy recipe; one thing to remember - it's a very sticky dough!

1 1/2 teaspoons active dry yeast
1 cup water, warmed to 110F
2 cups all-purpose flour
1 tablespoon unsalted butter, softened
1 teaspoon sugar
1 teaspoon salt
1/4 cup cornmeal, or as needed
Oil or solid vegetable shortening, as needed

Place the yeast and warm water in the bowl of a mixer and stir to completely dissolve. Let the yeast proof until foamy, about 5 minutes. Add the flour, butter, sugar, and salt to the yeast mixture. Mix ingredients together on low speed using the dough hook until all ingredients are blended, about 2 minutes. Increase the speed to medium-high and mix until the dough is smooth, another 5 minutes. Cover with plastic wrap and let the dough rise in a warm place until doubled in size, about 1.5 hours. Fold the dough gently over on itself in three or four places and turn the dough out onto a lightly floured work surface. Divide dough into 12 equal pieces. Shape into rounds. Add the cornmeal to a plate. One at a time put the dough rounds into the cornmeal and coat both sides lightly. Place on a sheet pan that has been heavily dusted with cornmeal. Cover and let rise until slightly risen, about 30 minutes.

Preheat a griddle over medium heat and brush lightly with oil or shortening. Cook the English muffins until lightly brown on the bottom, about 5 minutes. Turn the muffins over and cook until golden brown, another 5 minutes.

Split the English muffins by pulling them apart with a table fork. Toast them just before serving. Serve very hot. Eat & Enjoy!

Cheers,

Nikko

Saturday, December 4, 2010

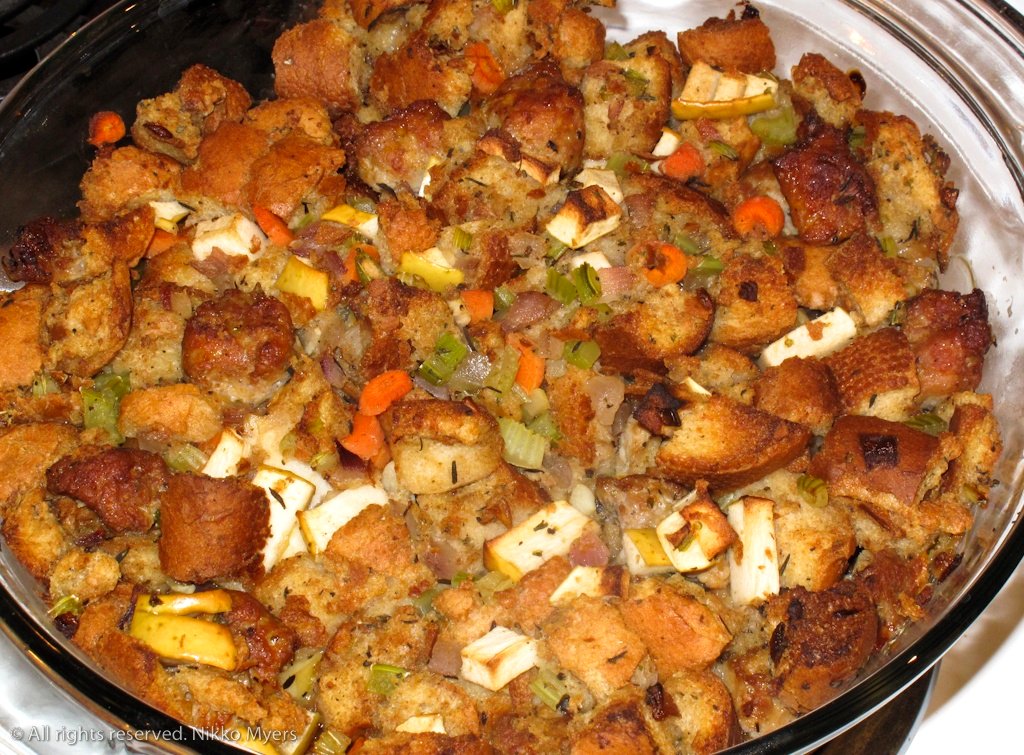
Turkey Sausage & Apple Stuffing

I have made stuffing before, however it came from my friends at Stove Top... A friend was having an early Thanksgiving Day dinner and I decided it would be a good time to try my hand at some homemade stuffing. Not to toot my own horn but my stuffing kicked booty... Even the picky eaters were shoveling it in.

I had decided that a sausage stuffing would be good. Because of some of the dietary needs I used a nice turkey sausage. For the read I used a whole wheat baguette that came from the local market. The only part of this recipe I looked up is what was in poultry seasoning. Come to find out all you really need is thyme, marjoram, and sage to get a nice flavor rolling. The apple part came on a whim at the market.

2 Whole Wheat Baguettes, cubed about 6-8 cups
5 Turkey Sausage links, casings removed and broken into bite size pieces
1 Golden Apple, diced
2/3 Cup Carrots, diced or sliced
2/3 Cup Red Onion, diced
1 Cup Celery, diced
2 Garlic Cloves, minced
Chicken Stock, enough to make it all nice and moist
2 Tbsp Butter
Thyme
Marjoram
Sage
Shallot Salt
Pepper

In a large saute pan brown the sausage over medium heat until cooked through. While the sausage is cooking cube up the bread and place it in a bowl large enough to mix everything in. Dice the apple and add it to the bread. Dice up the celery, onion, and carrots and reserve in a bowl. Mince the garlic and add to the veg mixture. Once the sausage is done add it to the bread bowl. Melt two tablespoons of butter in the pan you used to cook the sausage over a medium low heat (you can omit this if you don't want to use it. I always say, if it is good without butter it will be better with it...) Once the butter is melted add the veg mixture to the pan. Add a nice pinch of salt and pepper to the mix and stir it in. For the seasoning - I'm going to ask you to add amounts of these that make you happy. Start by adding a heavy pinch of the thyme, marjoram, and sage. Start small and add until it gives you a smell that you like. Once mine started smelling like a nice mix I stopped. I probably ended up with a few teaspoons of each (a little heaver on the thyme but that's just because I love thyme). You will want to cook this for about 5 minutes or just until everything starts to get a bit soft. Once finished add the the bread bowl and mix everything together well. I used almost 4 cups of stock to get everything to a happy moisture. Start by adding two cups and work your way up from there. We are looking for moist not wet. When I was done mixing everything together there was not a puddle of stock on the bottom of the bowl. Once you have a happy mixture, put into a baking dish and bake at 350 for an hour.

Happy Cooking & Eating!

~Nikko

.:.


Friday, May 28, 2010

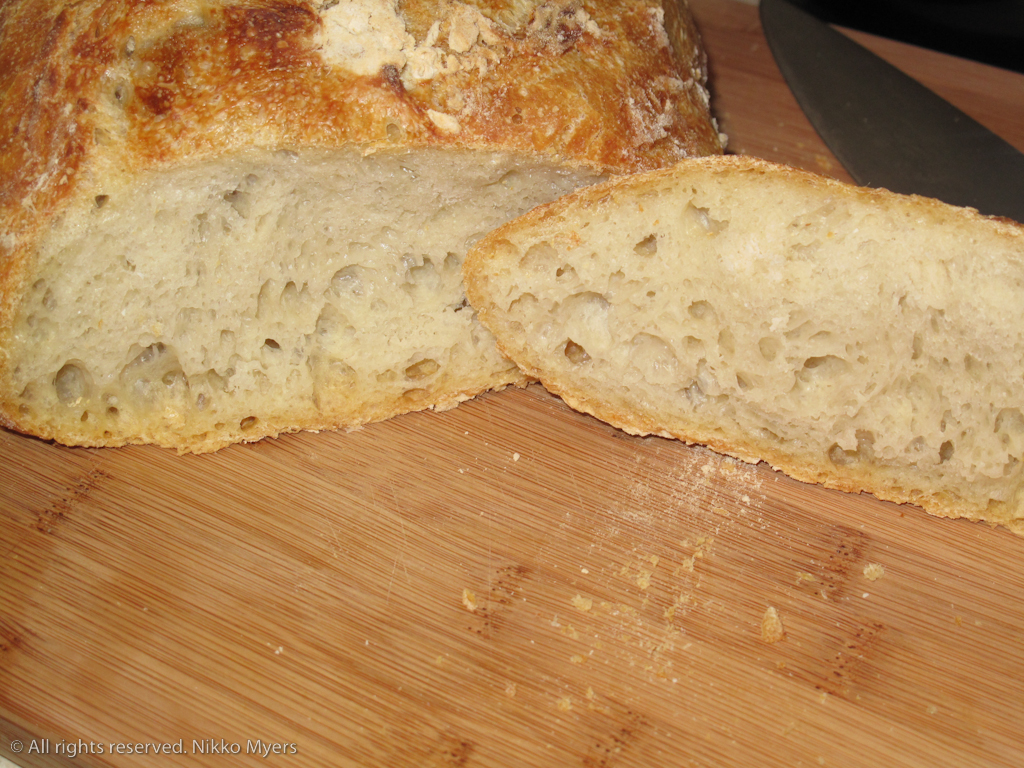
No Need to Knead Bread - The First Attempt


I would love to be a master bread maker, but alas I am nowhere near anything of the such. I am getting better so there is some light at the end of the tunnel - you just have to use binoculars to see it.

I love bread! With the past visit to Paris eating so many types of wonderful bread, I've got the itch to learn how to make bread anyone and everyone would love.

This is cheating but it still makes some amazing bread - so good that I would give it to friends...

The one thing you must have to make this recipe is a heavy 5-Quart or better pot that can withstand a 450F oven. I use an enameled cast iron pot, but a Pyrex or something like that will work too...

3 cups bread flour
1/4 teaspoon instant yeast (yes that is all you need)
1 tsp table salt
1 1/2 cups warm water

Put the flour in a large bowl. Add the yeast and salt to the bowl. You don't have to but I like to mix everything up a bit before I add the water. Add the warm water and mix everything together. You can use your hands for this but I wouldn't - the dough will be very sticky and will stick all over you! Once everything is incorporated you want to cover the bowl with plastic wrap and put it in a draft free place. Let the dough sit for 19 to 24 hours. Use a spatula to dump the dough on a well flowered counter or board. Add flour to your hands and you want to fold the dough over on itself in thirds (like folding a letter). You want to bring in the sides then fold over the top and bottom. Put the seam side down them transfer the dough ball to a bowl lined with a kitchen towel that has been well floured. Pull the towel over the dough then let sit for an hour. When 30 minutes have passed add your pot to the oven and turn it up to 450F. When the hour is up take the pot from the oven and put the dough into the pot. Cover and return to the oven for 30 minutes. When the timer goes off remove the lid from the pot and bake for another 15-20 minutes. Once finished carefully remove the bread from the pot (it will be rocket hot) and let it cool on a rack for at least 1 hour! Do not touch it before the hour is up - I know that's hard to do but it will be worth it... Cut you off a slice and give it a try. It will have a nice smell and great taste... Eat & Enjoy!


Happy baking!

~Nikko

--


Tuesday, March 16, 2010

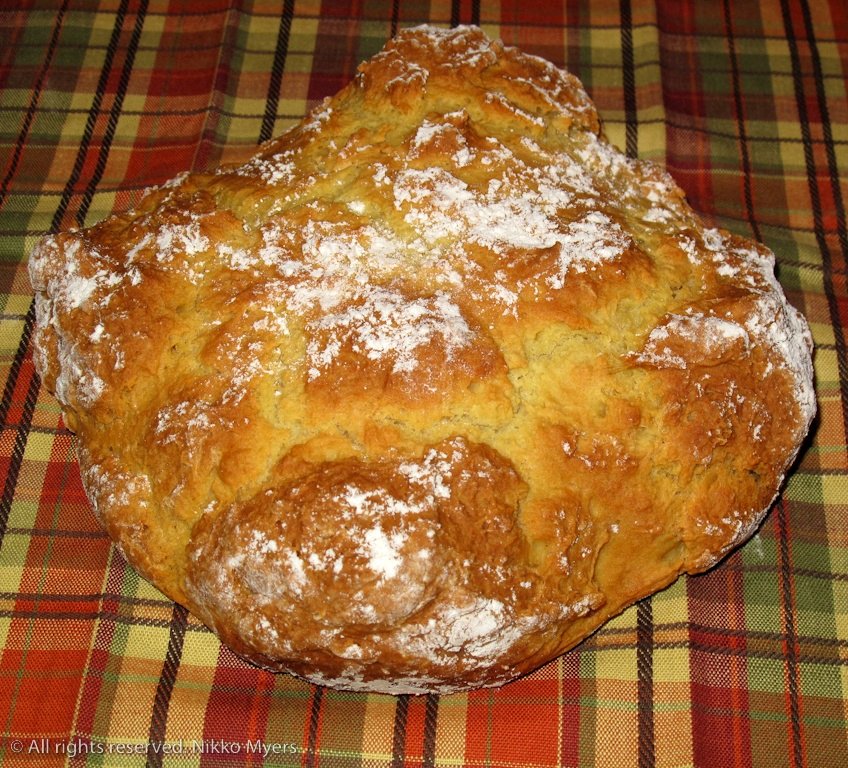
Irish Soda Bread

Irish Soda Bread

I want to be a master bread maker, however history has proven that I suck at making bread. I was looking at bread recipes and thought that Irish Soda Bread would fit into my abilities because there's not much to it. Put it all together, not much kneading, bake, butter, eat - how hard can that be? It turns out to be not hard at all. It was just as easy as the recipe said it was and I'll be dipped if it didn't disappear in a matter of minutes after it cooled and some butter was introduced to it. You'd think people around here hadn't eaten in days the way it went down. I have to admit it was pretty dang good. The next time I don't think I'll cut such a deep cross into it - maybe just 1/2 inch or so. Despite the appearance not being exactly what I wanted the taste was spot on! I'm so freaking happy it turned out, I wanted to raise my fists in the air and run around yelling "I am the Irish Soda Bread Champion" - first time in history I've made bread other than pizza crust I wanted to eat.

3 Cups all purpose flour
1 Tsp salt
1 Tbsp oil
1 Heaping tsp soda, sifted
1 Cup + 2 Tbsp buttermilk
bit of water - maybe 2 tablespoons or so - depends on your dough you want it kinda sticky

Grease and flour a 9-12" round bread pan (maybe 2 - 3" high sides. Put flour in a bowl, add salt and soda - mix well. Make a well in the flour mixture and add the butter milk, and oil. Mix well using a spoon adding a bit of water at a time as needed. This will form a very soft (and sticky) dough. The brilliant thing is that next no kneading is needed. Once the dough has come together turn it out onto your flowered counter. You do want to knead it a few times (really only 5 - 10 times), and roll into a ball. With a sharp knife, cut a deep cross across the top of the dough - about an inch or so deep. Give the top of the bread a quick dusting of flour. Put your dough-ball into the prepared pan - make sure the cross is still prominent in the dough - if not do it again. Bake in a preheated 400 degree oven for 45 minutes. Turn the bread out and let cool on a wire rack. Serve with heaps of butter...

Happy Baking & Bon Appetit...

~Nikko

--

Tuesday, December 8, 2009

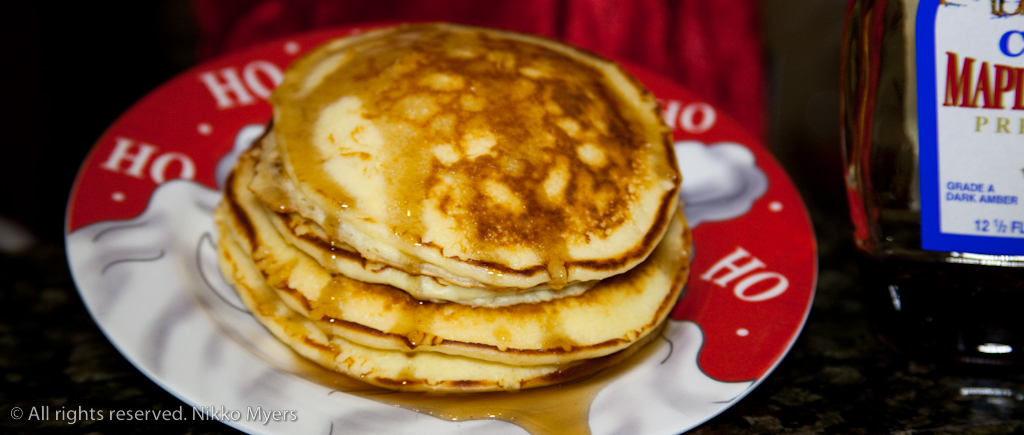
Pancakes


I have two recipes I use for making pancakes. Both have been tried and trued over many years. The one here is the one that produces very good pancakes, and I share with anyone who asks for it - the other however falls into the secret files, and I'm not sharing...

1 1/2 Cups Flour
1/2 tsp salt
1 tsp Sugar
2 1/2 tsp Baking powder
1 Egg
1 Cup Milk
3 Tbsp Butter, melted and cooled, plus extra for cooking
Softened butter, for serving
Warmed Maple syrup, for serving

Sift the flour, salt, sugar, and baking powder into a large bowl. Whisk together the milk, egg, and butter in a small bowl. Make a well into the flour and add in the wet mixture. Whisk everything together well, but do not over mix. It shouldn't take you more than 30-40 strokes to bring it all together well. If there are a few lumps - leave them be they will work themselves out. Bring a griddle (or large saute pan) to a medium head and add a spot of butter. Once the butter has melted coat the bottom of the pan. It's always good to start with a test pancake to make sure your temperature is at the right level (this will vary per pan) - the good thing here is if it's good you can eat it, and if not give it to the dog... You can make your pancakes any size you want, but I almost always go with a 1/4 cup of batter. Once you have your batter in the pan just leave it alone until bubbles form on top and a few of them pop. Once they have popped it's time to flip. Carefully flip them over and cook the other side - this will not take as long as the first side. If you need to store them before serving put your oven on it's lowest serving and store them on a hotel pan under a towel until you're ready to serve. Serve with butter, jelly, syrup, etc... Eat & Enjoy!

Happy Cooking & Eating!

~Nikko

--

Monday, December 7, 2009

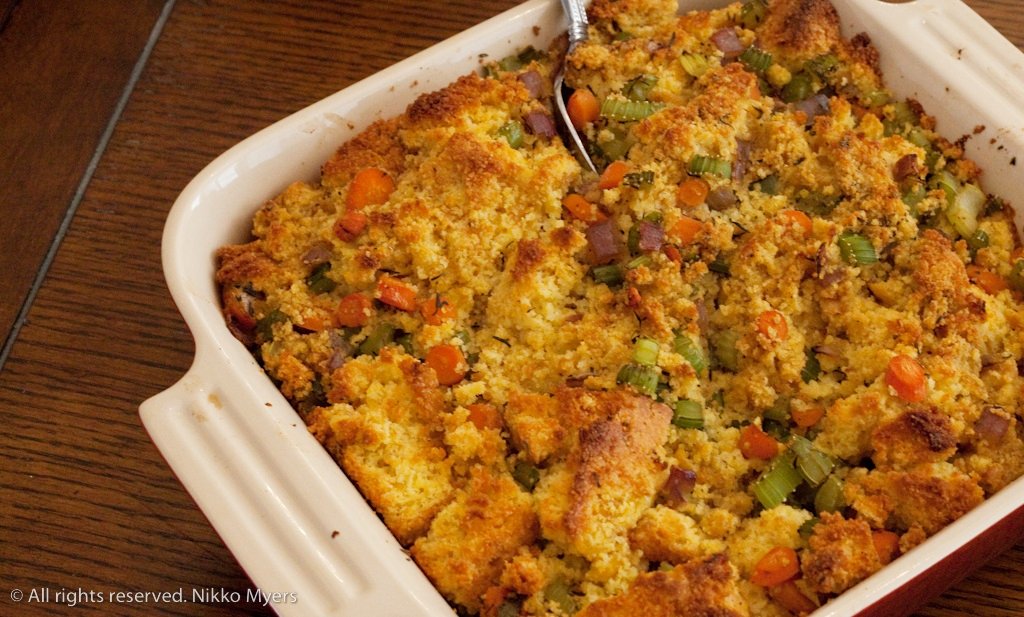
Cornbread Stuffing


So I made one homemade stuffing that knocked everyone's socks off so I thought I would try my hand at another. Cornbread stuffing has always been a favorite of mine and I'm glad I finally tried it. The only thing I would have done differently in this recipe would be to add some sausage to it.

1 Recipe for cream corn cornbread (http://cookingmywayvideo.blogspot.com/2009/11/creamed-corn-cornbread.html)
1 Cup Celery, diced
1 Cup Carrots, diced or sliced
1/2 Cup Red Onion, diced
2 Garlic Cloves, minced
Chicken Stock, enough to make it all nice and moist
2 Tbsp Butter
Thyme
Marjoram
Sage
Cayenne pepper, pinch
Chipotle pepper, pinch
Salt
Pepper

Start by prepping up the veg. Melt a few tablespoons of butter in a saute pan over medium heat. Add the veg and a healthy pinch of salt to start the sweating process. While the veg is doing its thing, cut the cornbread into inch or so cubes. Be careful when cutting the cornbread because it's quite delicate. Just like in the last stuffing recipe - For the seasoning - I'm going to ask you to add amounts of these that make you happy. Start by adding a heavy pinch of the thyme, marjoram, and sage, and a small pinch of the cayenne and chipotle. Start small and add until it gives you a smell that you like. Once mine started smelling like a nice stuffing mix I stopped. I probably ended up with a few teaspoons of each (a little heaver on the thyme but that's just because I love thyme). You will want to cook this for about 5 minutes or just until everything starts to get a bit soft. Add about a cup of chicken stock to the pan and let it warm up. Once finished add the the bread bowl and carefully fold everything together well. Add enough stock to moisten everything well. Once you have a happy mixture, put into a baking dish and bake at 350 for an hour.

Again next time I make this I'm going to add some nice country sausage to the mix. It was good as it was, but that would have made it a lot better...

Happy Cooking & Eating!

~Nikko

--

Wednesday, November 25, 2009

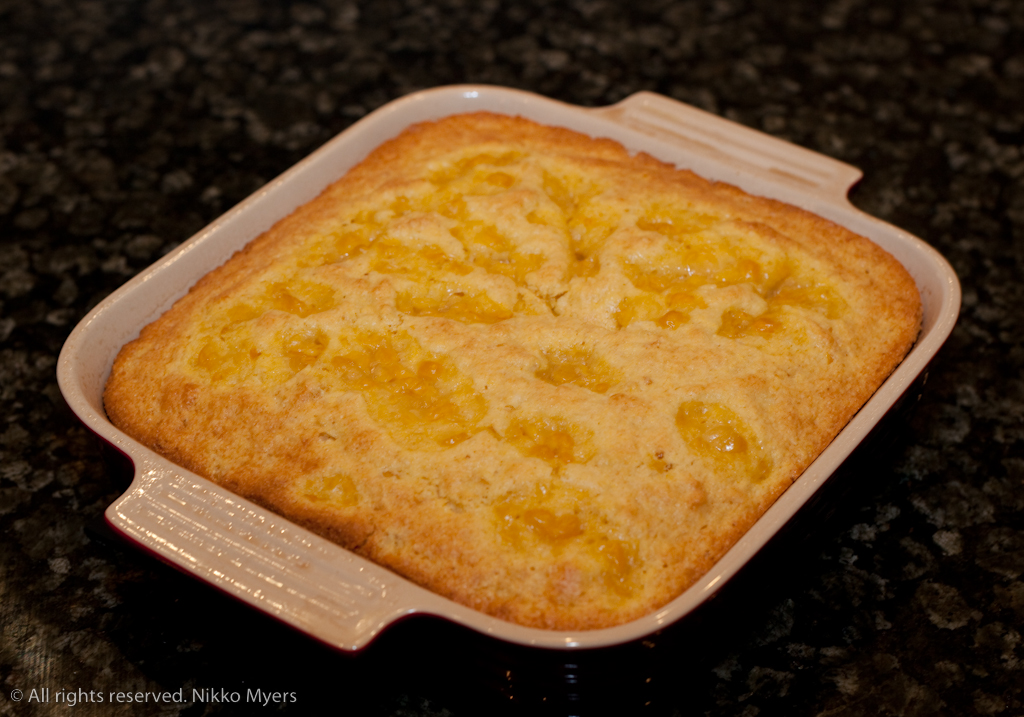
Creamed Corn Cornbread

Please visit our new site at www.CookingMyWay.com

This is a tried and trued recipe that I've been using for years now. Most people will balk at the use of the Jiffy cornbread mix but I tell ya when you want to make a quick and delicious cornbread you just can't beat the ease of use. My x-wife was so much a southerner she wouldn't even let me bring the box into the house... Anyway if you want to have a nice plate of cornbread in under 30 minutes this is the way to go!

2 boxes Jiffy cornbread mix
1 can creamed corn - will only need about 3/4 of the can
2 eggs
pepper - I used white pepper just to keep it clean looking
cayenne pepper - just a pinch

Start by dumping the cornbread mix into a large mixing bowl. Use a whisk to break up any big lumps. Make a well in the middle of the mixture and crack in two eggs. Whisk the eggs until they are broken down. Add about a quarter teaspoon of white pepper (you can use black pepper if you want), a pinch of cayenne, the creamed corn and mix everything together well. Pour mixture into a baking dish and bake at 400 for 15 to 20 min...

You can dress this up as you wish. In the past I've added some sweated red onion and celery - have made it with blanched broccoli and cheddar cheese (that was a good one recipe coming soon) - feel free to add your own flair...

Happy cornbreadding!

~Nikko

--


Friday, October 2, 2009

Blue Cheese Crust...


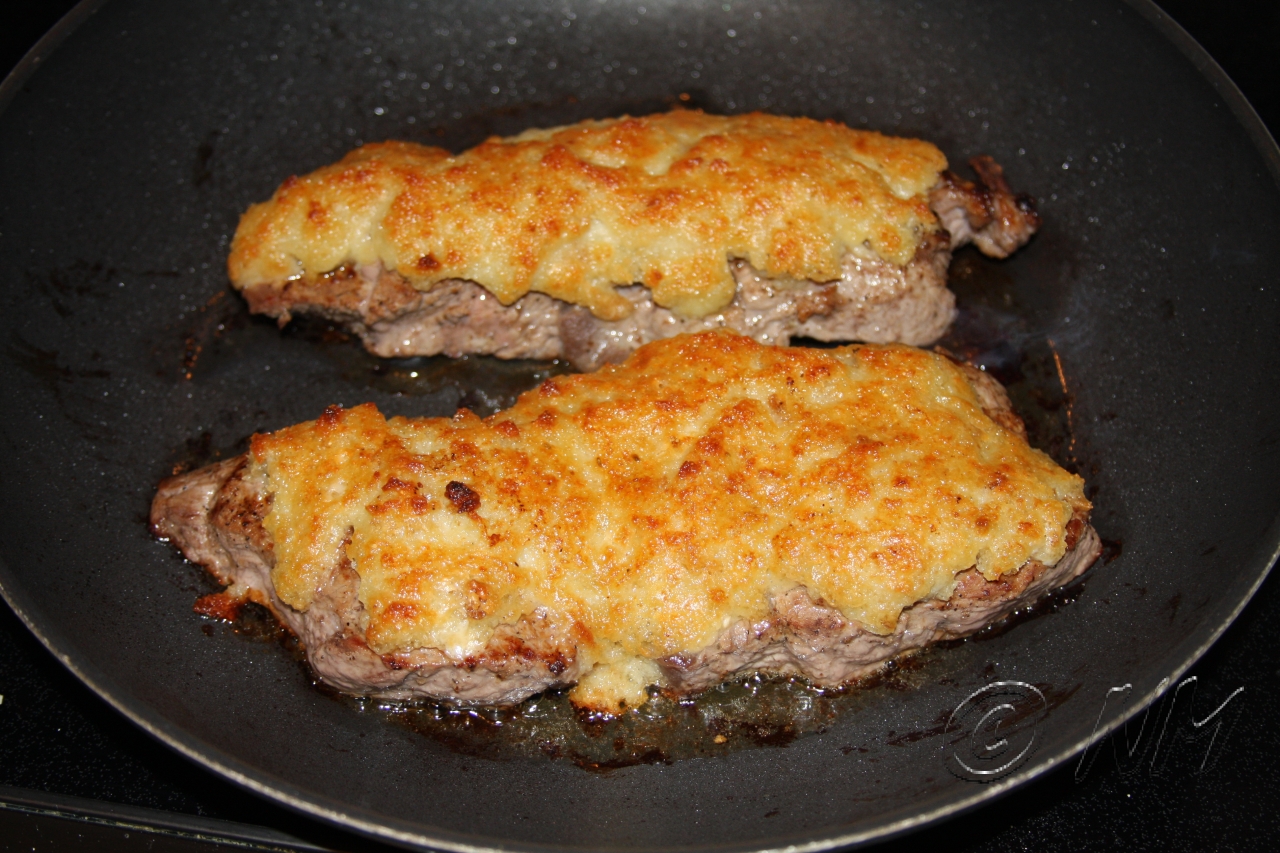
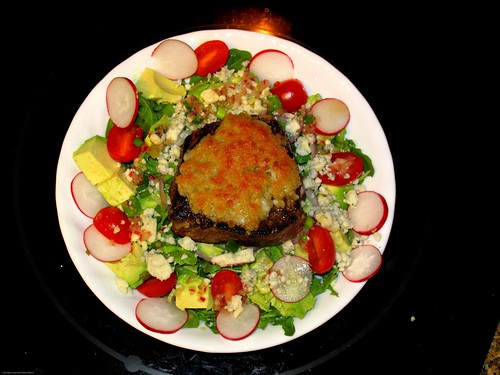
I've tried many a combination of blue cheese on top of a steak in my days, but this is my favorite way. I've tried many blue cheese butters to put a steak and none really bring that flavor I like. I tried to thThe blue cheese crust is quite simple to make - equal parts blue cheese, bread, and a few tablespoons of butter blitzed in a processor until mostly smooth. Cook the steak until nearly done then carefully top with the blue cheese mixture and broil for 3-5 minutes until the crust starts to brown. Try it sometime...

Bon Appetit...

~Nikko


Friday, April 3, 2009

Easy Italian Bread

Italian Bread

1 Cup 100-110 degree water
2 Tablespoons olive oil
3 Cups bread flour
1 Package fast rising yeast
2 Teaspoons sugar
Pinch salt

In a bowl add the flour, yeast, sugar, and salt. Mix together well. Add the water and olive oil. Mix until it all comes together then turn out onto a floured surface. Knead for 10 minutes until the dough turns smooth. Form the dough into a ball and put into an oiled bowl. Cover with a dishtowel and let rise for 40 minutes. Punch down the dough and form into a baguette shape. Dust a heavy sheet pan with corn meal and put the dough onto the pan. Cover with the dishtowel and let rise for another 40 minutes. With a sharp knife make 1 inch slices into the dough. Bake for 25-35 minutes in a 375 degree oven. Let rest for at least 1 hour before slicing. Eat and enjoy...

To be honest this loaf didn't come out so well - Ok it sucked - It was heavy and kinda flat tasting... Will keep trying though...

Bon Appetit...

~Nikko

--