
Saturday, October 31, 2009

Friday, October 30, 2009
Spicy Pumpkin Seeds
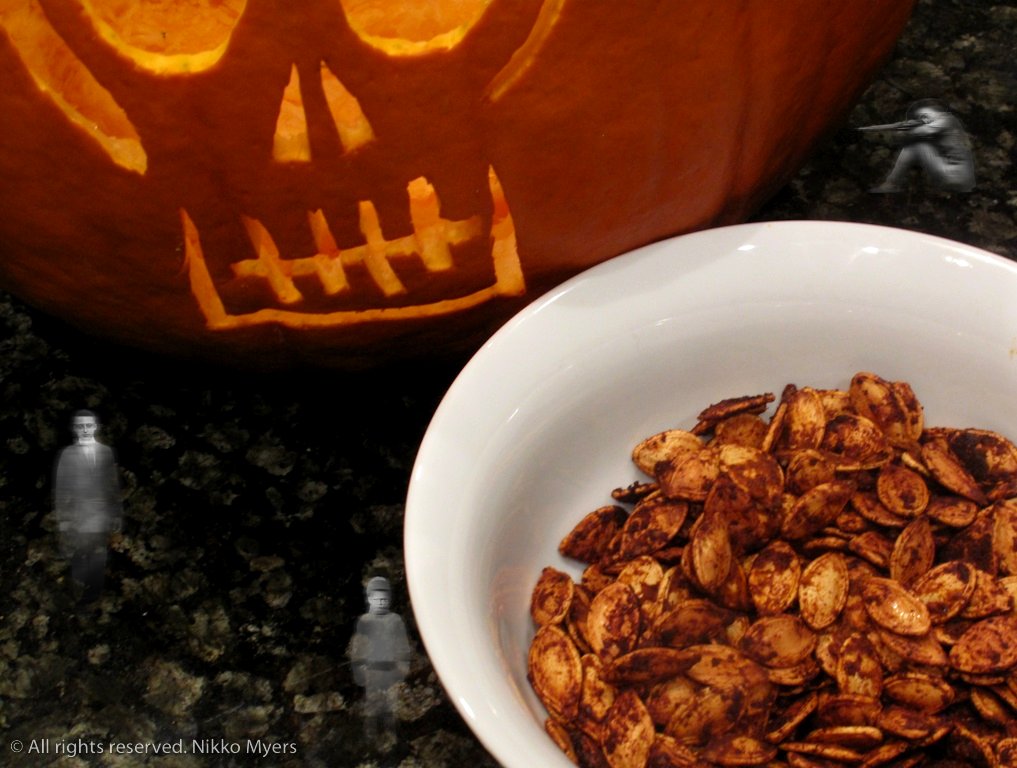
I had my first roasted pumpkin seed at John Warner's house when I was in grade school. I can remember they were buttery, garlicky, and a bit salty... I was in the mood for something cuminy, chili powdery, and a bit salty.
1 Cup Pumpkin seeds, cleaned
.5 tsp Sweet Paprika
.5 tsp Chili Powder
.5 tsp Cumin
.25 tsp Garlic Powder
.50 tsp Salt
1 Tbsp Olive Oil
Preheat the oven to 350 degrees. Mix all the spices and oil in a bowl. Pour the mixture over the pumpkin seeds and mix well. Put a sheet of foil over a sheet pan. Spread out the pumpkin seeds in a single layer. Bake until golden, about 15 minutes. Cool - Eat & Enjoy...
Bon Appetit...
~Nikko
--
Thursday, October 29, 2009
Happy Birthday Tortilla Guy...
Well it's my buddy Steve The Tortilla Guy's birthday today. I can't bake a cake to save my life so I'm just making a happy b-day blog post for him... Happy birthday buddy...


The Hummus Wrap

First things first - Start with a good wrap - I've said it before and I'll say it again, until I'm proven wrong the best wraps I've used come from Tumaro's Tortillas. This is one of my favorite wraps to do and it's the very first wrap in my upcoming book 101 Things To Do With A Tortilla!
Tumaro's Spinach wrap
Shredded lettuce
Red Onion
Cucumber, seeded
Tomato
Feta Cheese
Hummus
Salt
Pepper
To build - Lay down your wrap and slather on some hummus. Top that with the lettuce, cucumber, tomato, feta, and salt and pepper (given the feta is salty watch how much salt you use). Fold in the sides of the wrap and start rolling from the back. Eat & Enjoy!
Bon Appetit...
~Nikko
--
Wednesday, October 28, 2009
Foodie Thoughts...
"Tomatoes and oregano make it Italian; wine and tarragon make it French. Sour cream makes it Russian; lemon and cinnamon make it Greek. Soy sauce makes it Chinese; garlic makes it good." ~ Alice May Brock
Sesame Seed Seared Tuna - So easy to make you won't believe it.
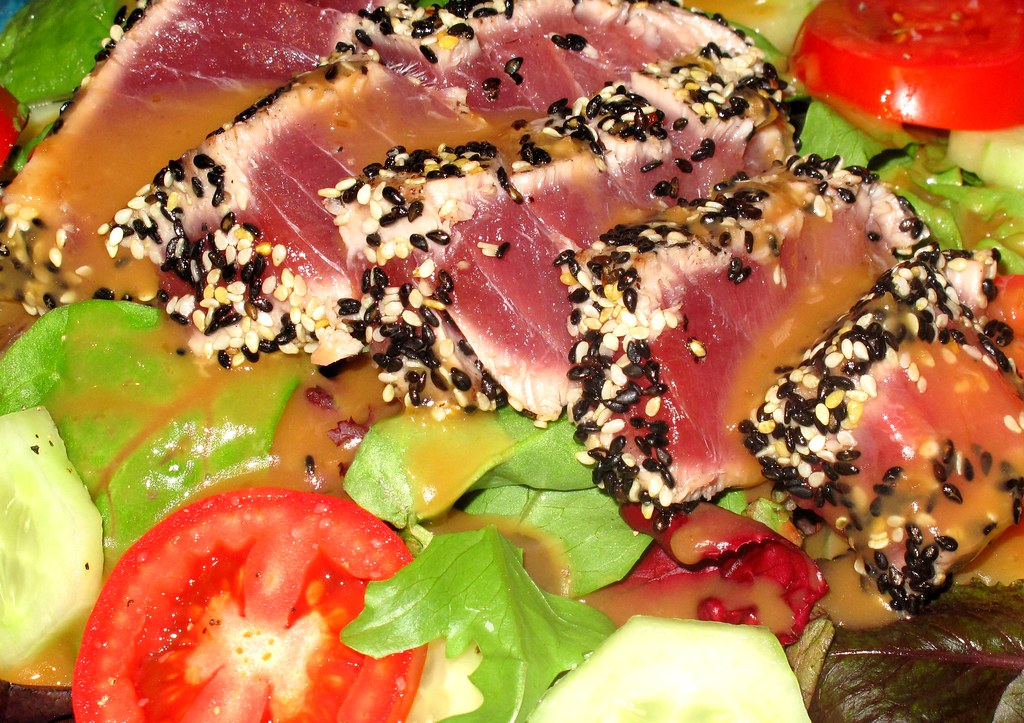
I've been wanting to make my own sesame seed seared tuna for about 10 years now. No kidding it really has been that long. I'm not sure why it has taken me so long to make it but now that I have to admit I'm almost upset at how easy it was to do. Really my 9 year old sister could pull this one off...
The first thing you need for this dish is some fresh Ahi Tuna - Fresh is the key here. Since you're not cooking it all the way through you want it as fresh as possible. I got this Ahi tuna at Costco. It was so dang good it almost hurt.
.5 Lbs Ahi Tuna
Black & white sesame seeds
Salt
Pepper
Salad stuff:
Lettuce mix of your choice
Tomatoes
Cucumbers
Avocado
Ginger-Soy Dressing (I got mine from the store)
Wasabi (it's ok to say it like the Bud commercials)
The hardest part of this dish is cutting up the veg for the salad. I'd start by preparing the salad first - wash and dry the greens - arrange them on a plate. Chop the veg to your liking and arrange them on the salad. In a dish add a healthy amount of sesame seeds - black and white if they are available (but just white will do). Salt and pepper the tuna on both sides. Coat both sides of the tuna with the seeds. Heat a skillet to medium high and add a few tablespoons of olive oil (or any type of oil you like). Add the tuna to the skillet and cook for 1-2 minutes on each side. When the tuna is cooked, remove it to a cutting board and cut on the bias. Place on the salads - Eat & Enjoy!
Bon Appetit...
~Nikko
--
Tuesday, October 27, 2009
Lasagna For Scott...
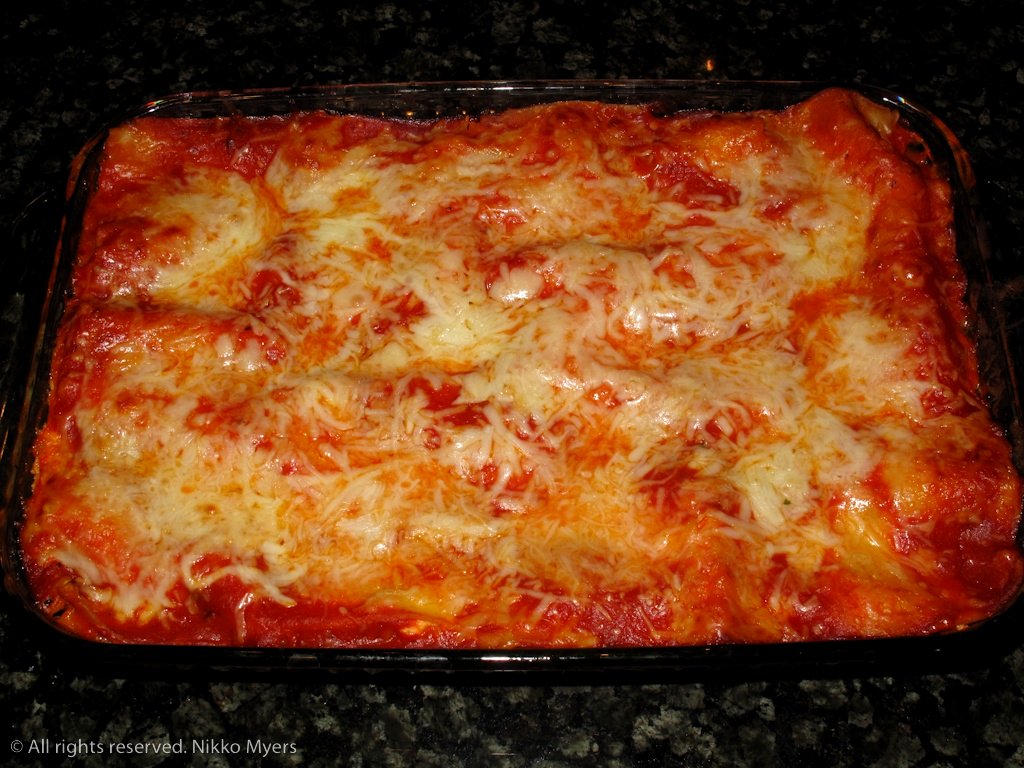
It's nice to have some loyal fans - I don't have many, but I don't do this for fame and fortune I do it because I love it... Anyhow a little over a year ago I got an email from a viewer telling me how to make better videos - "hey Nikko i love food vids so i'm going to help you make 5 star shows ! have all your veg cut and ready, and cans open other wise we have to sit through you opening cans and going to the garbage can etc. this way we dont lose our mind and get board plus you can make 1 vid instead of 3 or 4 for 1 dish. ps i love the food you make keep them coming a big fan. Scott" Yes I kept the email - I took the advice and it has helped! Even I get bored watching some of the old videos... Although the blog doesn't get a heap of traffic (yet) the videos on YouTube and Vimeo get quite the hits.
Well I asked Scott what he wanted a video of, and he chose Lasagna. I have made lasagna in the past but none of them were much to talk about. I brought in a ringer and I have to say Lisa put the smack down on this lasagna. It was amazing! This is just a cheese lasagna, but you can certainly stuff it with meat if you want. We're going to do another version that is loaded with meat - so check back...
1 Large tub Ricotta cheese
3 Tbsp parsley, chopped fine
1/4 tsp nutmeg
Lasagna noodles
4 Cups mozzarella cheese
1 Cup Parmesan cheese
2 Large eggs, beaten
1 Jar Ragu Organic Sauce (it's the best I've ever tried)
salt
pepper
13x9x2 baking dish
Large bowl to make your cheese mixture
Start by making your cheese mixture - in a large bowl combine the ricotta, 2 cups of the mozzarella, half a cup of the Parmesan cheese, the parsley, pinch of salt and fresh ground pepper, and the beaten eggs (make sure you beat the eggs before you add them to the mixture). Mix everything together well and store in the fridge until ready for use. Cook your lasagna noodles as directed by the package. After you have drained off your noodles, rinse them with cold water. Now it's time to build some goodness! Lay down a thin layer of the sauce in your baking dish - this will help with no sticking. Put down strips of the noodles to cover the bottom of the dish - top evenly with a third of the cheese mixture. Lay down another layer of the pasta however this time lay them the opposite direction - you will need to cut them to fit. You do this to keep the structure sound when you cut the lasagna later it will stay up and not slide all over the place. Put down another layer of sauce then another third of the cheese. Top this layer of the cheese mixture with a little sprinkling of the mozzarella. Add another layer of the pasta and sauce then the remaining cheese mixture. Add your last layer of pasta, a final layer of sauce then the remaining mozzarella and Parmesan cheeses. Cover with tin foil and bake in a preheated 350 degree oven for 30 minutes. Remove the foil and bake for another 5-10 minutes or until lightly browned on top. Cut, plate - Eat & Enjoy...
Bon Appetit...
~Nikko
--
Monday, October 26, 2009
Bouchon...
A bouchon is a type of restaurant found in Lyon, France, that serves traditional Lyonnaise cuisine...

Frank's Red Hot Popcorn
This is quite easy... Kinda like a buffalo popcorn...
1 bag of popcorn - pick a non buttered one if you can find it...
2Tbsp butter
1 Tbsp Frank's Red Hot Sauce
Melt the butter and add the Frank's and mix together well. Pop the popcorn and put in a bowl. Pour over the butter/Frank's mixture and mix. Eat & Enjoy!
Bon Appetit...
~Nikko
--
1 bag of popcorn - pick a non buttered one if you can find it...
2Tbsp butter
1 Tbsp Frank's Red Hot Sauce
Melt the butter and add the Frank's and mix together well. Pop the popcorn and put in a bowl. Pour over the butter/Frank's mixture and mix. Eat & Enjoy!
Bon Appetit...
~Nikko
--
Saturday, October 24, 2009
Mojitos For Steve
So my buddy Steve the Tortilla Guy loves Mojitos - I decided to make this video in honor of him...
To make a Mojito you will need...
4 mint leaves
1 lime, juiced
1 ounce simple syrup
2 ounces white rum
2 ounces club soda
1 sprig of mint, for a garnish if you wish
ice
Juice the lime into your glass, add the mint and simple syrup. Muddle the mixture in the bottom of the glass. If you do it with a piece of ice down there it will really mix up the mint which is nice... Add the rum, top with the soda, garnish with a slice of lime and the mint - Drink & Enjoy!
Bon Appetit...
~Nikko
--
To make a Mojito you will need...
4 mint leaves
1 lime, juiced
1 ounce simple syrup
2 ounces white rum
2 ounces club soda
1 sprig of mint, for a garnish if you wish
ice
Juice the lime into your glass, add the mint and simple syrup. Muddle the mixture in the bottom of the glass. If you do it with a piece of ice down there it will really mix up the mint which is nice... Add the rum, top with the soda, garnish with a slice of lime and the mint - Drink & Enjoy!
Bon Appetit...
~Nikko
--
Friday, October 23, 2009
Cipriani Tagliolini - The best out of the box pasta you will ever eat. I beg you to prove me wrong.
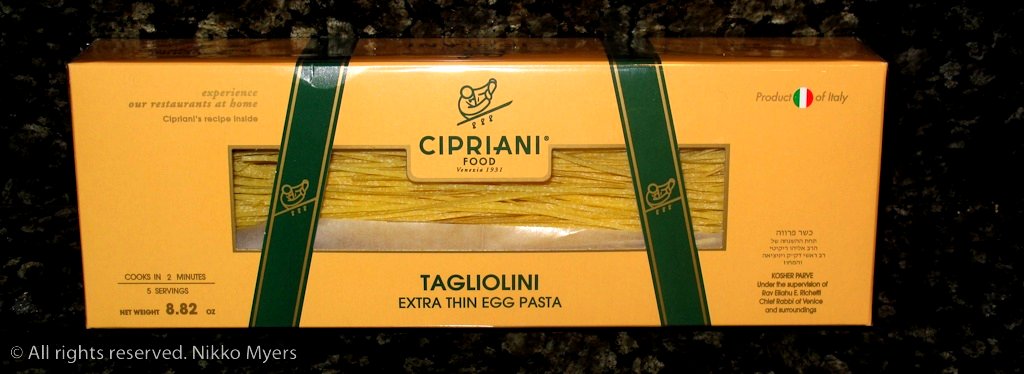
It's my dad's birthday and when I asked him what he wanted to eat he said pasta. I said I would make it from scratch but as always he said don't go to the trouble. There's something very therapeutic to me about making my own pasta. Even though I can make it in my sleep now I'm still mesmerized every time I see my grandmother make pasta (she doesn't even measure anything and it all comes out perfect every time). Anyhow, I was at the market to get some nice bread and cheese for the meal and just happened to look in the pasta isle. The Cipriani pasta box stood right out at me for some reason and after reading the back of the box (see below) I had to try it. Even in the box it looks wonderful.
From this point forward, when I don't have time to make the pasta myself - Cipriani Tagliolini is my go to boxed pasta. It always will be until someone can prove me wrong. Go ahead I challenge you. I triple dog dare you too... I am man enough to say that it is every bit as good as mine is - it's not exactly the same, but it's really close. When it comes to pasta in a box it's freaking amazing!
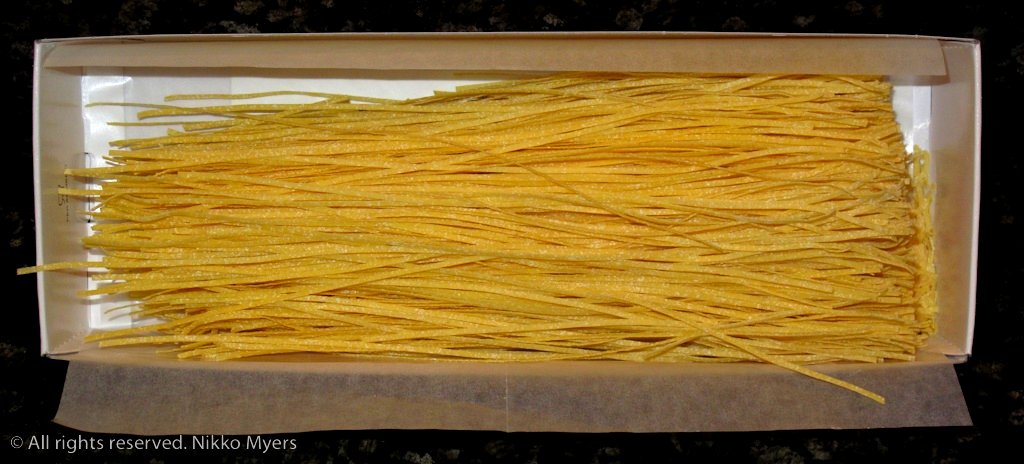 The box says that it will give you 5 servings - it's not kidding. I had 5 people around the table tonight and I made two boxes just to be sure, we all ate like Kings and Queens and only ate half of the pasta... It only takes a few minutes to cook - You will spend more time bring the water to a boil than you will making the pasta and heating the sauce...
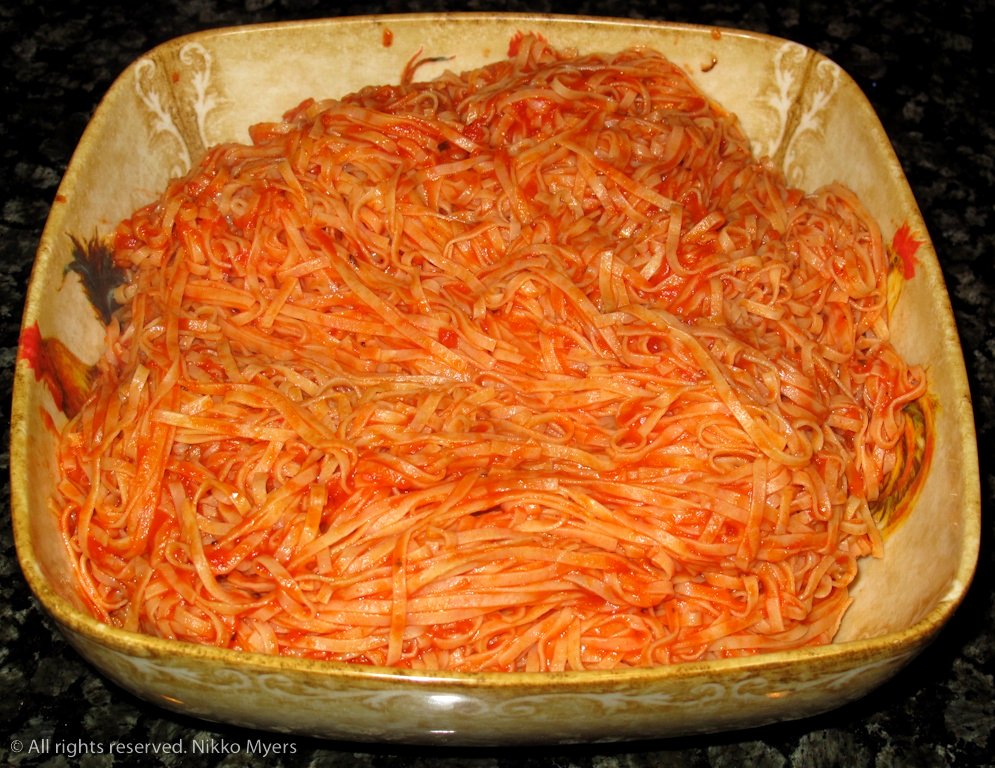 Here's the finished product - I'll admit I was a total slacker tonight - the pasta was out of a box, and I even used sauce out of a jar - If you've never tried Ragu's Organic sauce you're missing out. It's perfect right out of the jar. I had someone once try and doctor it up and to be honest she should have left it well alone - her messing with it made it not as good. Anyway - I'm all for making your own sauce but give the organic version a try and let me know what you think...
Bon Appetit...
~Nikko
From the back of the box!
What makes the Cipriani Pasta Special:
- Seven whole grade A fresh eggs are used for ever kg. of the best durum wheat.
- One hundred times the dough is processed through the press and the cylinders. No other pasta is produced with the same care which makes its thin, delicate but compact texture grow more than any other.
- Sixteen hours the length of time we keep it in a low temperature dryer
In 1931, a long-sought dream became reality. Giuseppe Cipriani opened the doors to Harry's Bar. In a discreet stone building perched along the canal just off Piazza San Marco in Venice, he created a timeless and impeccably appointed establishment. His concept was to serve others like you would want to be served yourself. His vision of luxury in simplicity would touch the soul of people all over the world. At Harry's Bar in Venice, and Italian National Landmark since 2001, all clients are treated like royalty. The secret of Cipriani isn't about what can be seen or touched, but what can be flet and sensed. It's intangible but palpable. It can't be patented, but even after seventy-five years it hasn't been duplicated by others.
I needed a cigarette after I read all that...
Thursday, October 22, 2009
Wednesday, October 21, 2009
I'm a lonely little petunia in an onion patch
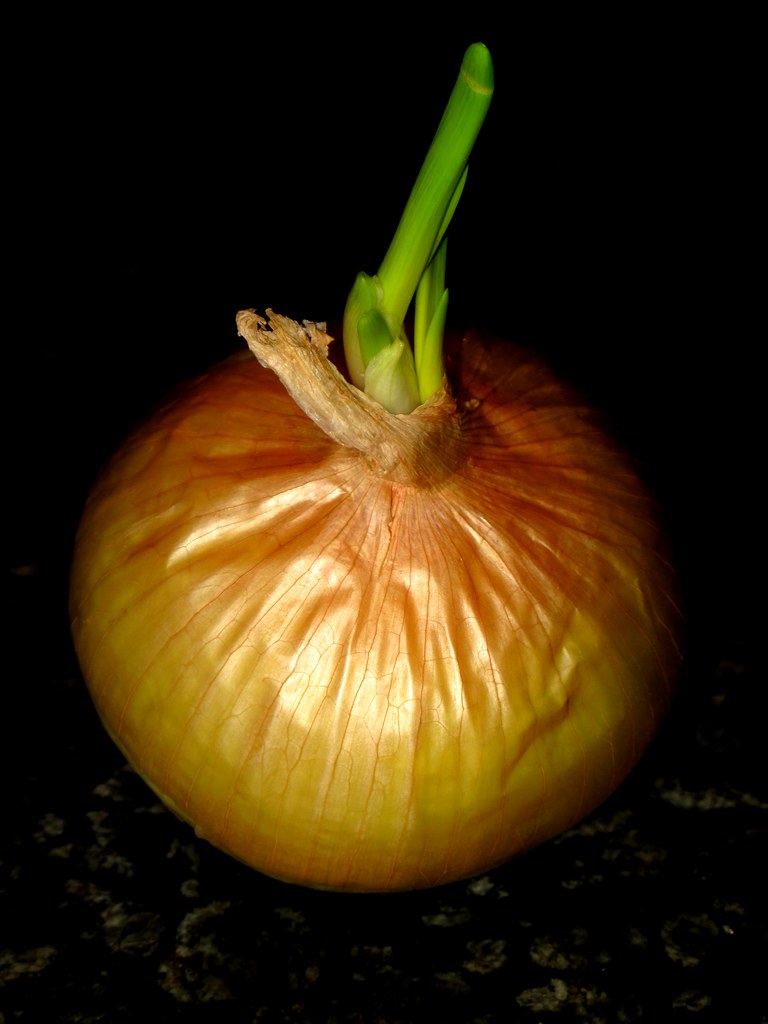
Not much to say today but I liked how this photo came out so I thought I would share...
Bon Appetit...
~Nikko
Tuesday, October 20, 2009
New York Deli - Orlando Florida

I had to have passed this place 50 times before I had the chance to go in and give it a try. I had always wanted to stop, but time was never on my side... It's located in Orlando snuggled amongst a few of my clients, and I live outside of Jacksonville (a few hours away)...
I finally got the chance when I was on my way to a meeting and the client called to push it off for a few hours. I'm really glad they did because the people were friendly, and the food was fantastic!
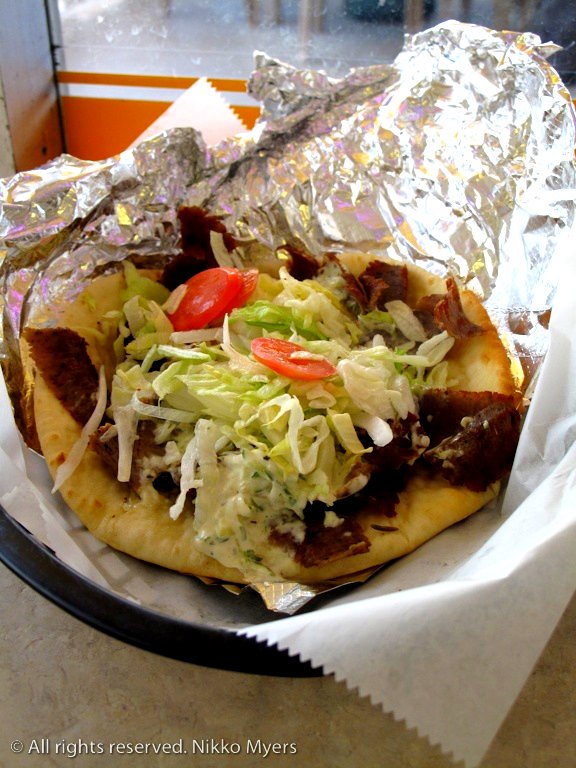
I'm a huge gyro fan - let me state that again for the record, I'm a huge gyro fan - as you can see from the photos my only option was to get one and see how it was... It looked amazing - it smelled amazing - and it was 100% perfect! The pita was nice and warm, the meat was juicy and tasty, the tzatziki sauce was your standard variety but good, the lettuce, tomatoes and onions were all fresh - and most of al,l it all came together well...
Everything I saw them make looked really good as well, but if you're going to go I highly suggest trying one of their gyros fist...
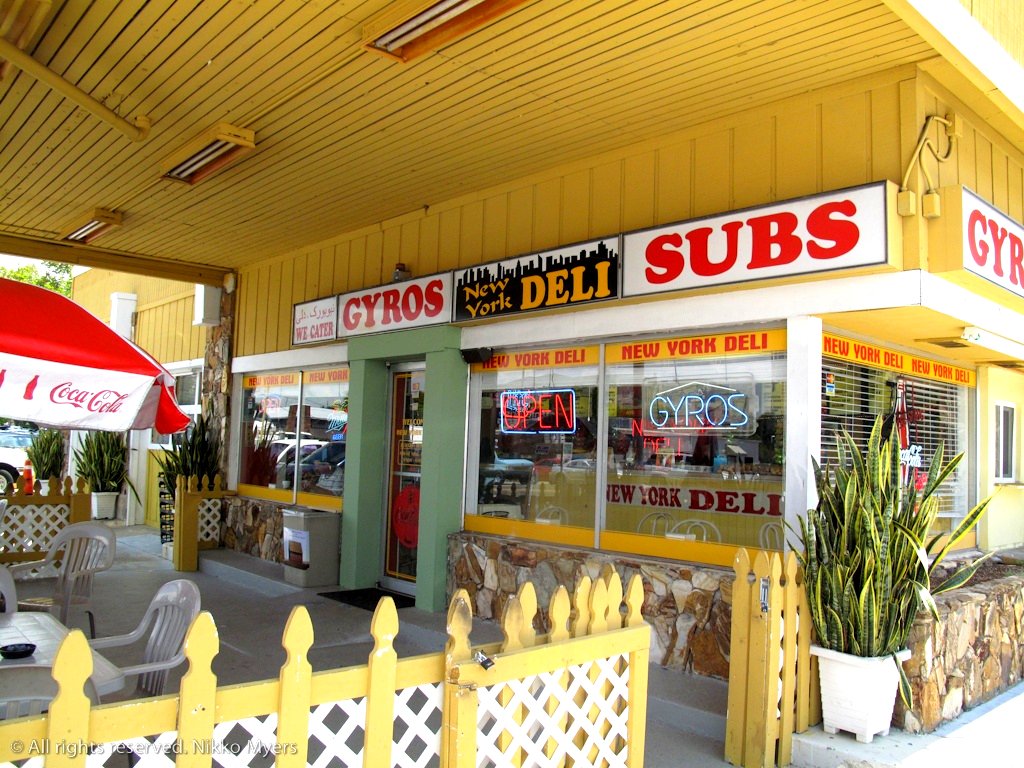 New York Deli
 693 N Orange Ave
Orlando, FL 32801-1342
(407) 649-4900
Bon Appetit...
~Nikko
Monday, October 19, 2009
Lamb Burgers
 These lamb burgers will make you happy...
1 lb ground lamb
1 small onion diced
1 tsp mint
1 Tbsp Penzeys Greek seasoning
2 Tbsp soda water
Salt
Pepper
Arugula
Tzatziki sauce
Baguette
You will need a large enough bowl to handle a pound of meat, a grill or grill pan (can use a broiler if you want, I've done it and it works just fine), and a set of hands (or a spoon)...
In a large bowl add everything but the arugula, tzatziki sauce, and the baguette. Mix with a large spoon or your hands until everything is well incorporated. Form into long thinner patties. Grill your lamb burgers until they are cooked to your preferred temperature. Like I said you can do this on a grill, on the stove in a pan, or under the broiler - I've used them all and they all work well...
Build - Cut the baguette into pieces that will accommodate the burgers (if you really want to get crazy you can toast the baguette before use). Spread the tzatziki sauce on both sides of the baguette. Put some of the arugula down on the bottom of the baguette, top with the burger then put on the top piece - Eat & Enjoy!
Bon Appetit...
~Nikko
--
Friday, October 16, 2009
Chili Rellenos Casserole
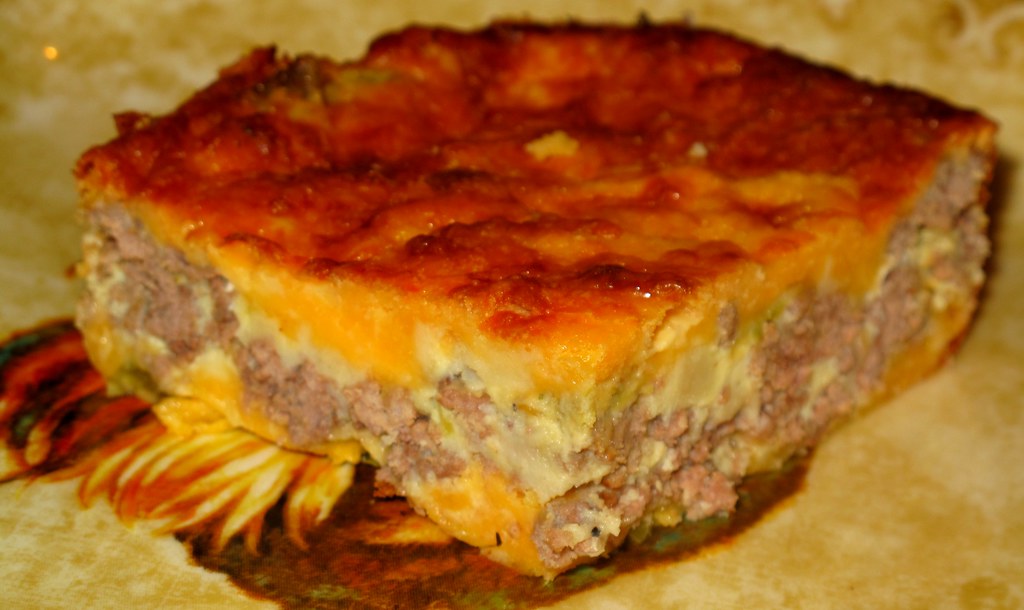
One of the things I love most about this dish is that it's good hot, at room temperature, and cold straight out of the fridge... I have been eating this dish most of my life. We don't have it very often but it's always fun and easy to make. The little one even likes to help put it together because it's so easy to do.
1 lb Ground sirloin
½ cup Chopped onion
1 tsp olive oil
½ tsp Salt
¼ tsp Pepper
1 4 oz can Green Chiles - If you really like chiles you can use two cans
1 ½ cups Shredded sharp cheddar cheese - or a Mexican blend
1 ½ cups Milk
¼ cup Flour
½ tsp Salt
Dash Pepper
4 Eggs beaten
Dash Tabasco
In a medium sized saute pan add the olive oil, onion and a pinch of salt and cook until translucent. Once the onion is ready, add the beef, salt, pepper and cook until just browned (cooked through). Because this dis his going in the oven, you do not have to over cook the beef - it will continue cooking in the oven. Drain all the fat off the mixture and set aside. In a 10 x 6 x 1.5 inch baking dish add half the chilies - if you really like chilies like I do, you can use two cans of chilies. Sprinkle with cheese, and top with the meat mixture. Arrange the remaining chiles over the meat. Combine the remaining ingredients, beat until smooth and pour over the dish. Bake at 350 degrees for 45 – 50 minutes...
You can eat it straight away or let it come to room temperature - I even like it cold out of the fridge (which is the state it was in when I took the above photo)...
Bon Appetit...
~Nikko
Monday, October 5, 2009
Popcorn - In The Bag & On The Stove...
Popped corn, butter, salt, pepper...
Although it's convenient to throw a bag of popcorn in the micro - it usually doesn't produce great results. Try finding a non buttered popcorn in the bag - butter, more butter, ultra butter, movie butter, mega butter, just butter... It's bonkers if you ask me.
Only a few companies make a natural non buttered popcorn. Paul Newman's Natural Popcorn is the best in the bag popcorn I've ever tasted. When I want butter on my popcorn, I'll melt some real butter and put it on my popcorn... So my advice is to try the Paul Newman's pcorn if you're going to do it in the bag...

If you don't want to use the bag to make your popcorn, on the stove can produce some really good results. I use a method that produces some really good corn with little leftover un-popped kernels. Add your corn and oil to the pan - turn the heat to high and let cook uncovered until 3 of the kernels pop - immediately take it off the and do a slow count to 60. This gives the kernels a chance to heat up and get ready to explode! After a minute has gone by put the pan back on the high heat, cover it, and shake it until it's done - be careful not to burn it! Carefully pour it out into bowls, eat & enjoy!
Bon Appetit...
~Nikko
Although it's convenient to throw a bag of popcorn in the micro - it usually doesn't produce great results. Try finding a non buttered popcorn in the bag - butter, more butter, ultra butter, movie butter, mega butter, just butter... It's bonkers if you ask me.
Only a few companies make a natural non buttered popcorn. Paul Newman's Natural Popcorn is the best in the bag popcorn I've ever tasted. When I want butter on my popcorn, I'll melt some real butter and put it on my popcorn... So my advice is to try the Paul Newman's pcorn if you're going to do it in the bag...

If you don't want to use the bag to make your popcorn, on the stove can produce some really good results. I use a method that produces some really good corn with little leftover un-popped kernels. Add your corn and oil to the pan - turn the heat to high and let cook uncovered until 3 of the kernels pop - immediately take it off the and do a slow count to 60. This gives the kernels a chance to heat up and get ready to explode! After a minute has gone by put the pan back on the high heat, cover it, and shake it until it's done - be careful not to burn it! Carefully pour it out into bowls, eat & enjoy!
Bon Appetit...
~Nikko
Friday, October 2, 2009
Blue Cheese Crust...
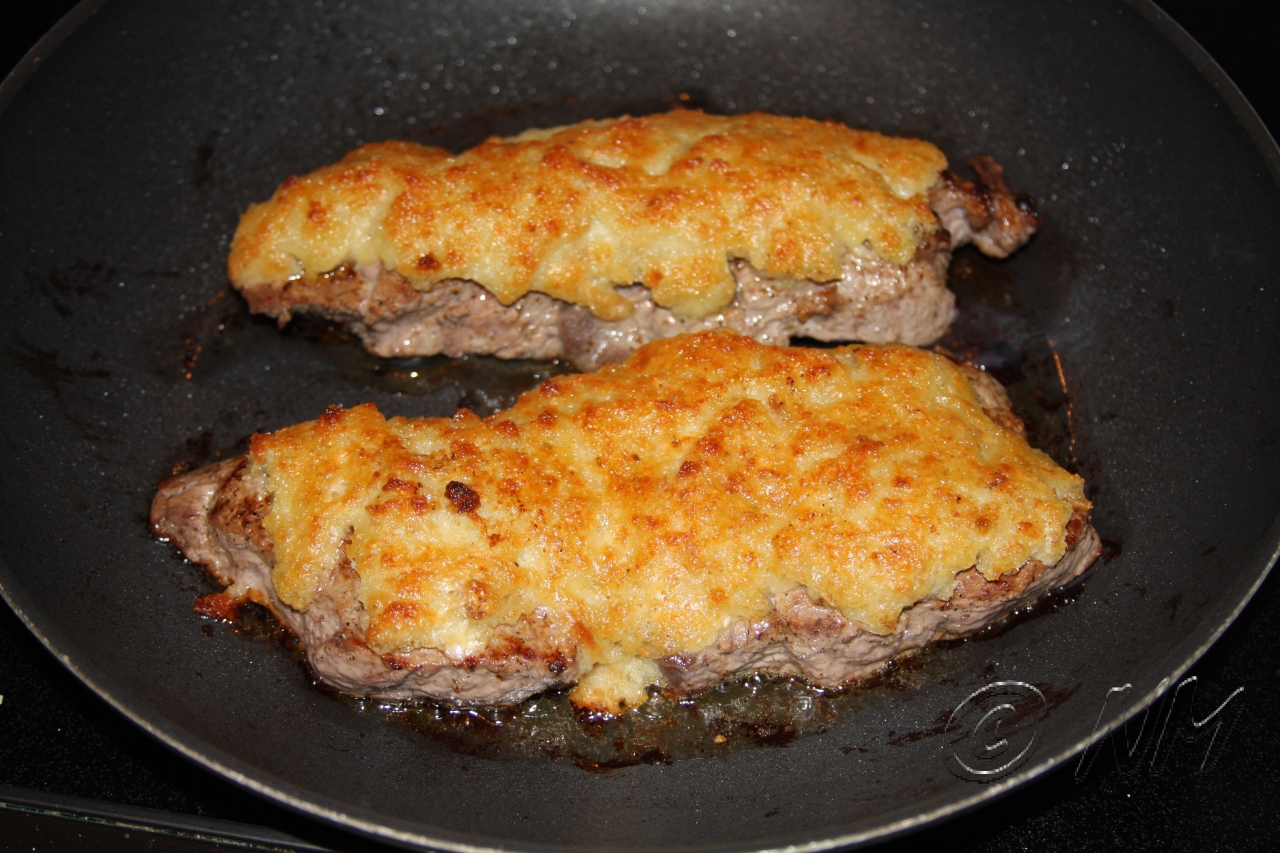
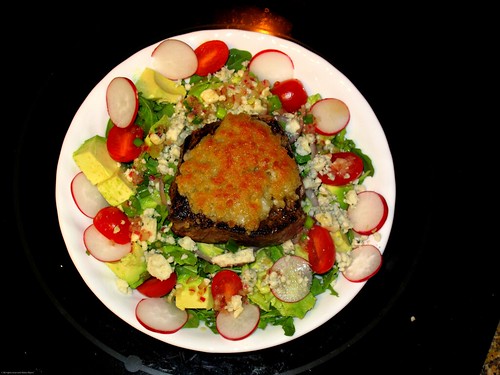 I've tried many a combination of blue cheese on top of a steak in my days, but this is my favorite way. I've tried many blue cheese butters to put a steak and none really bring that flavor I like. I tried to thThe blue cheese crust is quite simple to make - equal parts blue cheese, bread, and a few tablespoons of butter blitzed in a processor until mostly smooth. Cook the steak until nearly done then carefully top with the blue cheese mixture and broil for 3-5 minutes until the crust starts to brown. Try it sometime...
Bon Appetit...
~Nikko

Wednesday, September 30, 2009
Tandoori Red Chicken Wings
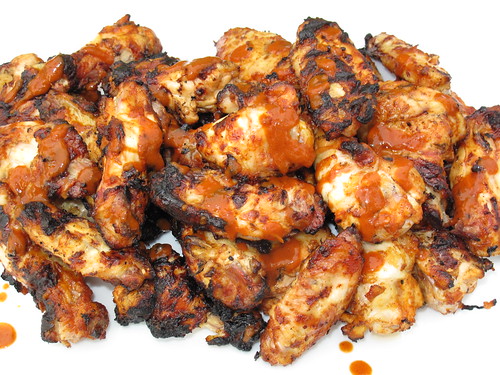
I was looking on Twitter a few weeks back and ran across this product called Tandoori Red. It's a Tandoori sauce that I must say works really well with chicken wings! You can use the sauce as a marinade, a sauce or a condiment. Again, it's great for Chicken BBQ.
Here's how I made my Tandoori Red Chicken Wings:
1 Jar Tandoori Red Sauce
1 Large container yogurt
Chicken Wings
You will want marinate your chicken wings for at least 2 hours but 24 would be better! Clean your chicken wings then put in a large container. Add the yogurt and half the bottle of the Tandoori Red sauce. Mix this together well so that all the chicken wings are coated. Store in the refer until ready to use. Once the chicken has marinated to your liking you will want to remove as much of the marinade as you can - just use your hands and see what you can get off - put the cleaned chicken wings in another bowl. Once finished add a quarter of the Tandoori Red Sauce to your bowl and mix around the chicken wings. Heat your grill to a medium high and put on the chicken wings. Cook for 10-15 minutes then rotate the wings - if you have any hot spots move the wings around. Half way through cooking brush on the rest of the Tandoori Red Sauce and continue cooking. Cook the wings until they are completely cooked - we are talking about chicken here and raw chicken is not so good for you... Plate, Eat & Enjoy!
www.TandooriRed.com
Bon Appetit...
~Nikko
--
Tuesday, September 29, 2009
The South West Breakfast Wrap
What you are about to read about and see could be deemed healthy...
1 Tumaro's Chipotle Chile Tortilla Wrap
.25 Lb Boars Head Cajun Turkey, cubed
5 Egg whites
2 Tbsp hatch chilies
2 Tbsp non-fat sour cream
.25 Cup tomatoes
2 Tbsp chipotle cheddar cheese
Heat the cubed turkey in a skillet over medium heat. Separate the eggs and put the whites in a bowl. Add the hatch chilies and sour cream to the egg whites and beat well. Add the egg mixture to the turkey and cook until the eggs are done to your liking - just remember if the eggs are done in the pan they will be overdone on the plate... Mix in the tomatoes and cheese. Build your wrap - lay down the wrap - add your egg mixture towards the back of the wrap - roll the wrap over the mixture - tuck in the sides and continue rolling. Cut on the bias, plate, eat & enjoy...
Bon Appetit...
~Nikko
--
1 Tumaro's Chipotle Chile Tortilla Wrap
.25 Lb Boars Head Cajun Turkey, cubed
5 Egg whites
2 Tbsp hatch chilies
2 Tbsp non-fat sour cream
.25 Cup tomatoes
2 Tbsp chipotle cheddar cheese
Heat the cubed turkey in a skillet over medium heat. Separate the eggs and put the whites in a bowl. Add the hatch chilies and sour cream to the egg whites and beat well. Add the egg mixture to the turkey and cook until the eggs are done to your liking - just remember if the eggs are done in the pan they will be overdone on the plate... Mix in the tomatoes and cheese. Build your wrap - lay down the wrap - add your egg mixture towards the back of the wrap - roll the wrap over the mixture - tuck in the sides and continue rolling. Cut on the bias, plate, eat & enjoy...
Bon Appetit...
~Nikko
--
Subscribe to:
Posts (Atom)


 Posts
Posts


