Wednesday, June 2, 2010

Tortellini Soup of Goodness


This is a hearty soup that only takes about 10 minutes to make. It's one of my favorites...

3 Cups Whole wheat cheese tortellini, fresh or frozen
4.5 Cups Chicken broth
4 Garlic cloves, minced
1 tsp Sage, dried
1 tsp Thyme, dried
2 Cups Spinach, fresh coarsely chopped
1 16oz can Cannellini beans, rinsed and drained
1/2 Cup Sun-dried tomatoes (or more if you really like them)
Parmesan cheese, grated
Pepper, fresh ground

You can do this all in the same pot but I think it's better to cook the Tortellini in a seperate pot then transfer it to the soup base. I've tried it both ways and doing this works better. So with that said in a pot of salted boiling water cook the tortellini according to the package - do not overcook because it's going to go into the broth. In another large saucepan, bring the broth, garlic, sage, and thyme to a boil. Stir in the spinach, Cannellini beans and tomatoes. Reduce the heat and simmer for about 5 minutes. Add the tortellini and continue to simmer for a few more minutes. Ladel into bowls, sprinkle with the cheese, Eat & Enjoy...

Happy Cooking & Eating!

~Nikko

Tuesday, June 1, 2010

(Ohio State) Buckeyes

I grew up in Ohio with a backyard full of buckeye trees. We got so many buckeyes from the trees that people would come over all the time with pickle buckets to help pick them all up. I've been eating Buckeyes most of my life. Buckeyes are kinda like a Reese's Peanut Butter Cup (my favorite candy)... These are very easy to make and I've never had a hard time getting rid of them once I've had my fill...

2 Cups Peanut butter, smooth kind
1/2 Stick Butter, softened
16oz Box (or bag) Powered sugar

12oz Bag Chocolate chips
2 Tbsp Veggie oil

Use a mixer to beat together the peanut butter and butter. Once well mixed add the powered sugar a bit at a time and mix it all through. Once well mixed roll the mixture into balls about half the size of a golf ball and put on a wax paper lined sheet pan. When finished put the pan in the freezer for one hour. When the hour is up put the chocolate chips in a bowl and add the veggie oil. Microwave on high for 1 minute. Use a spoon to mix the chocolate together - it should be all melted. Use a toothpick to dip the peanut butter balls into the chocolate just far enough to cover 3/4 of the way up. Place them back on the wax paper and use a finger to cover up the hole the toothpick made. Once all the balls have been dunked place the tray into the fridge for 30 minutes. Pack the Buckeyes into a air tight container... Eat & Enjoy!

Cheers,

~Nikko

--

Friday, May 28, 2010

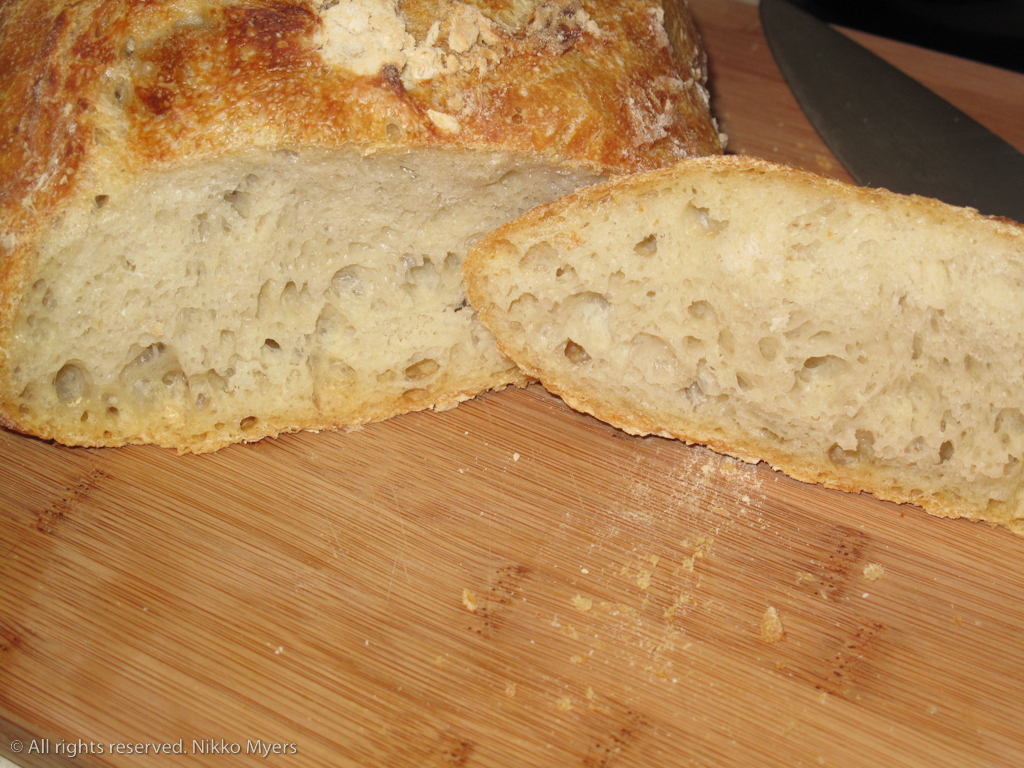
No Need to Knead Bread - The First Attempt


I would love to be a master bread maker, but alas I am nowhere near anything of the such. I am getting better so there is some light at the end of the tunnel - you just have to use binoculars to see it.

I love bread! With the past visit to Paris eating so many types of wonderful bread, I've got the itch to learn how to make bread anyone and everyone would love.

This is cheating but it still makes some amazing bread - so good that I would give it to friends...

The one thing you must have to make this recipe is a heavy 5-Quart or better pot that can withstand a 450F oven. I use an enameled cast iron pot, but a Pyrex or something like that will work too...

3 cups bread flour
1/4 teaspoon instant yeast (yes that is all you need)
1 tsp table salt
1 1/2 cups warm water

Put the flour in a large bowl. Add the yeast and salt to the bowl. You don't have to but I like to mix everything up a bit before I add the water. Add the warm water and mix everything together. You can use your hands for this but I wouldn't - the dough will be very sticky and will stick all over you! Once everything is incorporated you want to cover the bowl with plastic wrap and put it in a draft free place. Let the dough sit for 19 to 24 hours. Use a spatula to dump the dough on a well flowered counter or board. Add flour to your hands and you want to fold the dough over on itself in thirds (like folding a letter). You want to bring in the sides then fold over the top and bottom. Put the seam side down them transfer the dough ball to a bowl lined with a kitchen towel that has been well floured. Pull the towel over the dough then let sit for an hour. When 30 minutes have passed add your pot to the oven and turn it up to 450F. When the hour is up take the pot from the oven and put the dough into the pot. Cover and return to the oven for 30 minutes. When the timer goes off remove the lid from the pot and bake for another 15-20 minutes. Once finished carefully remove the bread from the pot (it will be rocket hot) and let it cool on a rack for at least 1 hour! Do not touch it before the hour is up - I know that's hard to do but it will be worth it... Cut you off a slice and give it a try. It will have a nice smell and great taste... Eat & Enjoy!


Happy baking!

~Nikko

--


Thursday, May 27, 2010

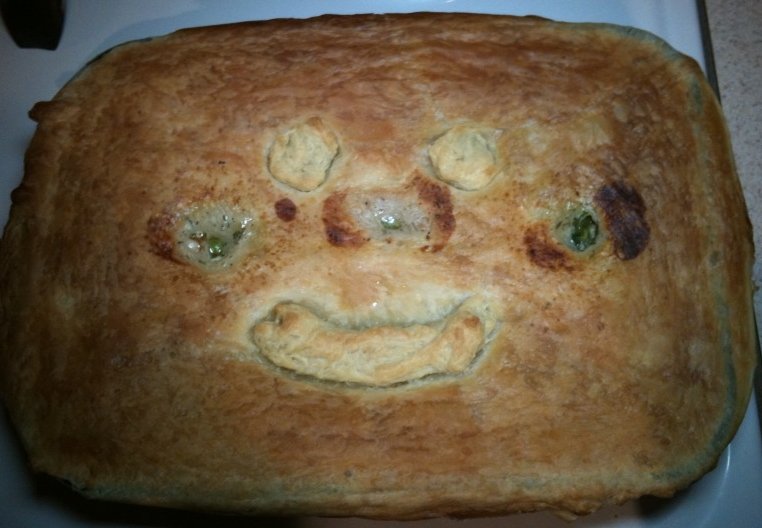
A Lighter Chicken Pot Pie‏

This is a nice lite version of a Chicken Pot Pie... It's very easy to make and you won't miss one bit of the fat!


2 Cups Chicken - Cooked and shredded (I used a rotisserie chicken from the store)
2 Tbsp Butter
2 Cups Mushrooms - Chopped
1/4 Cup Flour
2 Carrots - Chopped
1 Cup Celery - Chopped (Optional)
1 Onion - Diced
2 Cups Chicken Broth
1/2 Cup Fat Free Half & Half
1 Cup Frozen Peas
1 tsp Thyme - Dried
Fresh Parsley - Chopped (just a bit)
2 Cloves Garlic - minced
1 Peppridge Farms Puff Pastry Sheet - Thaw out before using
Salt
Pepper

Start by preheating the oven to 375.

In a large heavy pan or Dutch oven melt the butter over medium head. Add the carrots, onions and garlic - cook until soft. Add the mushrooms, celery (if used), chicken and flour, mix all together well and cook for about 5 minutes. Add the broth and half & half and cook uncovered for 10-15 minutes. Add the seasoning and frozen peas, cook for about 5 minutes. Pour the mixture into a rectangular baking dish. unfold the pastry and stretch to fit and cover the entire baking dish. Cut 2 small vents into the pastry to allow steam to escape. Place in the oven and bake for 25 minutes or until golden brown.

Eat & Enjoy!

Happy Cooking & Eating,

Nikko

--


Monday, May 17, 2010

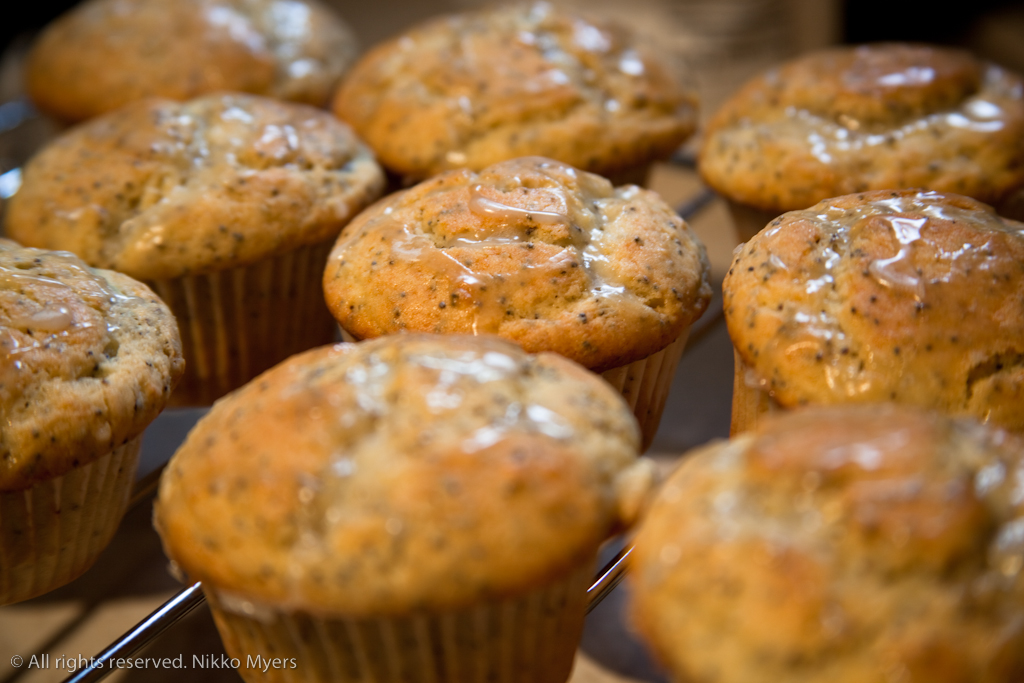
Lemon Poppy Seed Muffins - Made In A KitchenAid Mixer

I'm not much for baking but I have been trying my hand at it more and more lately. I looked at a dozen or so recipes and adapted this one from a few that I liked. This was my first time making these and I found a few things that I would change. The first would be to add more lemon extract to the mix to help bring out the lemon flavor. They tasted good from the first go around, but they could have been more lemony. I added a midge more to the recipe below. I also used the Ferrari (KitchenAid Mixer) to make this batch...

The Stuff:
2 cups all purpose flour
1/2 tsp table salt
1 1/2 tsp baking powder
1/4 tsp baking soda

1/2 cup (1 stick) unsalted butter, softened to room temp
1 cup white granulated sugar
lemon zest from 2 lemons
2 large eggs
2
Tbsp lemon juice
2 tsp pure lemon extract (I got mine from www.penzeys.com )
1 cup sour cream
2 Tbsp poppy seeds

For the glaze:
1
Tbsp lemon juice
1 tsp pure lemon extract
4
Tbsp powdered sugar

Start by preheating your oven to 350 degrees F.

In a medium size bowl whisk together the flour, salt, baking powder, and baking soda in a bowl, and set aside.

In the mixing bowl of your mixer, beat the butter, sugar, and lemon zest, until light and creamy - This will take a few minutes. I started slow at level 2 then moved up to 7. Beat the eggs into the mixture one at a time mixing the first one thoroughly before adding the second. Make sure to scrape down the sides of the bowl at least once during this process. Mix in 1/3 of the flour mixture until just combined - do this gently don't go over level 2. Mix in the lemon juice, extract, and 1/2 of the sour cream until combined.

Add half of the remaining flour mixture, and gently mix until combined. Mix in the remaining sour cream then once combined, mix in the rest of the flour mixture, and the poppy seeds.

You will need to line a muffin tin that will has room for 12 muffins. Put a paper baking cup in each space, and fill to the top with the batter. Bake for 30 minutes, or until golden brown. They will be done when you can insert a toothpick and it comes out clean. Remove from the oven and let sit for 5 minutes - while they are cooling mix the powdered sugar together with the lemon juice and extract to create a thin glaze.

You can either drizzle or brush the lemon glaze over the top of each muffin. You don't have to add this to the muffins, but I like how it looks, and the extra lemon taste...

When cool enough to handle, remove muffins from the tins and cool completely on a rack before serving.


Eat & Enjoy!

Happy Cooking & Eating,

~Nikko

P.S. Next time I make these I'll make a video...

Tuesday, March 16, 2010

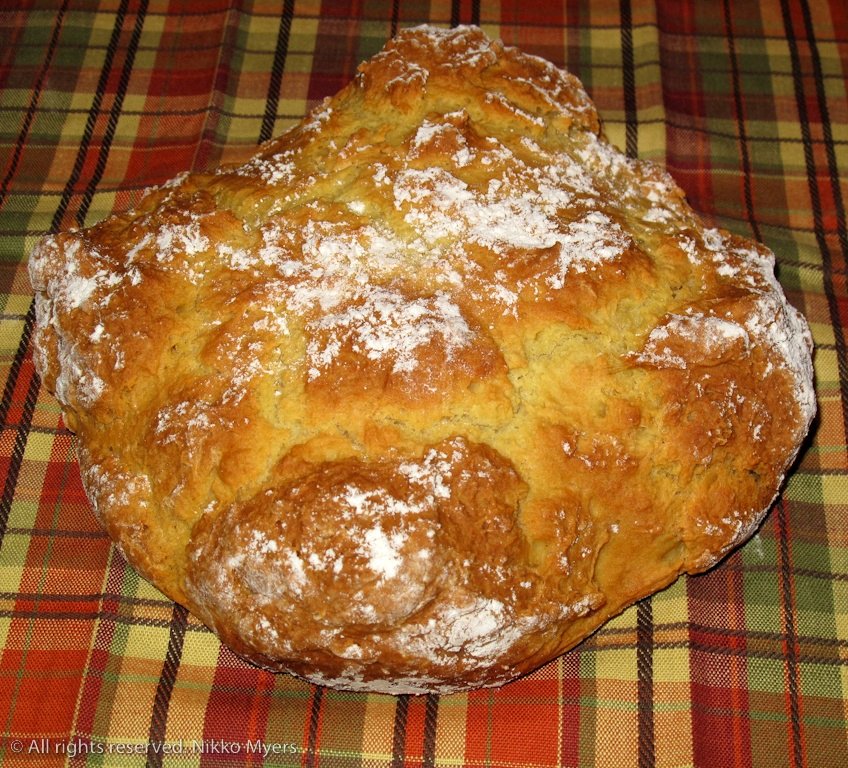
Irish Soda Bread

Irish Soda Bread

I want to be a master bread maker, however history has proven that I suck at making bread. I was looking at bread recipes and thought that Irish Soda Bread would fit into my abilities because there's not much to it. Put it all together, not much kneading, bake, butter, eat - how hard can that be? It turns out to be not hard at all. It was just as easy as the recipe said it was and I'll be dipped if it didn't disappear in a matter of minutes after it cooled and some butter was introduced to it. You'd think people around here hadn't eaten in days the way it went down. I have to admit it was pretty dang good. The next time I don't think I'll cut such a deep cross into it - maybe just 1/2 inch or so. Despite the appearance not being exactly what I wanted the taste was spot on! I'm so freaking happy it turned out, I wanted to raise my fists in the air and run around yelling "I am the Irish Soda Bread Champion" - first time in history I've made bread other than pizza crust I wanted to eat.

3 Cups all purpose flour
1 Tsp salt
1 Tbsp oil
1 Heaping tsp soda, sifted
1 Cup + 2 Tbsp buttermilk
bit of water - maybe 2 tablespoons or so - depends on your dough you want it kinda sticky

Grease and flour a 9-12" round bread pan (maybe 2 - 3" high sides. Put flour in a bowl, add salt and soda - mix well. Make a well in the flour mixture and add the butter milk, and oil. Mix well using a spoon adding a bit of water at a time as needed. This will form a very soft (and sticky) dough. The brilliant thing is that next no kneading is needed. Once the dough has come together turn it out onto your flowered counter. You do want to knead it a few times (really only 5 - 10 times), and roll into a ball. With a sharp knife, cut a deep cross across the top of the dough - about an inch or so deep. Give the top of the bread a quick dusting of flour. Put your dough-ball into the prepared pan - make sure the cross is still prominent in the dough - if not do it again. Bake in a preheated 400 degree oven for 45 minutes. Turn the bread out and let cool on a wire rack. Serve with heaps of butter...

Happy Baking & Bon Appetit...

~Nikko

--

Thursday, January 21, 2010

Homemade Pasta on a Imperia Pasta Machine

Nothing quite says love like homemade pasta. It really doesn't take all that long to do, and it will be better than anything you can buy at the market. My grandmother showed me how to make homemade pasta for the first time when I was about 9.

My grandmother doesn't remember when she got her pasta machine, but knows that the one shes uses is the one shes always had... I got my Imperia pasta machine at Williams-Sonoma. There are a few different types of pasta machines out there - pick the one that makes you happy...


Once you get the machine together it's time to make some pasta! The recipe I use is really easy:

2.25 cups of flour
3 eggs
pinch of salt
1 tablespoon water
1 splash olive oil

Pile the flour on your counter or a cutting board. Make a well in the middle of the flour large enough to hold the eggs, water, and olive oil. Add the eggs, water, and olive oil to your well - scramble the eggs with a fork. Once the eggs are well incorporated start bringing in the flour from the sides of the well. Keep mixing in the flour and when you get to a point where the eggs are not runny anymore you can put up the fork and use your fingers. Bring together the dough and knead for 10 minutes. You will end up with a smooth dough ball. Wrap the dough ball tightly in plastic wrap and let rest for 20 minutes. You can either put it in the fridge or leave it on your counter. Once rested cut your dough ball into four pieces. Working with one at a time, flour the piece and hand form it into a disc. Set your machine on it's widest level and start working the dough through. After each pass, set the machine to the next smallest level. The dough will get thinner and thinner as you go. Once done use the pasta cutter to cut the pasta. You can either hang the pasta or coat it with corn meal and let dry. Bring a gallon of water to boil and salt it well. Boil the pasta until it has a nice bite - about 5 minutes. Sauce the pasta and plate. Eat & Enjoy...

Bon Appetit...

~Nikko

--

Tuesday, January 12, 2010

Foodie Thoughts

I come from a family where gravy is considered a beverage. -- Erma Bombeck

Monday, January 11, 2010

Sushi - How to Make Pickled Ginger - Gari

1 Large piece fresh ginger, thinly sliced
1.5 Cups Rice vinegar
1 Cup Sugar
1 tsp Salt

The first thing you need to do is wash your ginger - it grows in the ground so it can be a bit dirty if they aren't washed before put in the bin. After you have washed your ginger use a spoon to scrape off all the skin - you will waste too much of the ginger if you use a knife. Slice the ginger root as thin as you can and put in a bowl. You can use a vegetable peeler or a mandolin to do your slicing. Add the salt to the ginger slices and mix them well and put in a colander. Let the salted ginger set for an hour. Dry the ginger slices with paper towels and put them in a sterilized container. Mix rice vinegar and sugar in a pan and bring to a boil to dissolve the sugar. Pour the hot sweet vinegar over the ginger slices and let cool. Cover the container and store it in the refrigerator for at least 24 hours. Eat & Enjoy!

Sushi on!

~Nikko

--

Wednesday, January 6, 2010

My World Famous Greek Stuffed Sweet peppers

This is a pretty easy dish to make. I've made this 20 times or so and it's always a hit!

1 LB Ground lamb
Sweet red peppers
2 Cloves garlic, minced
1 Egg
1 tsp Olive oil
1/2 Cup Bread crumbs, I used panko
1 Cup Feta cheese, crumbled
1 tsp Greek Oregano, www.penzeys.com
1 tsp Basil
Salt, pinch
Pepper, pinch

In a medium sized bowl mix everything but the sweet peppers together. Do not over mix this mixture... Once you have a good mix cover and put in the fridge for an hour - this will make the stuffing go a lot easier if you ask me. While your mixture is cooling off prep the peppers - start by cutting off the root end and cleaning out all the seeds. Once this is done wash the peppers in cold water and pat them dry. Take the mixture out of the fridge and using your hands stuff the peppers full. I like to cut off the bottom tip of the peppers just in case there is mega expansion that happens when baking. Put in a baking dish and drizzle a little olive oil over the top of the peppers. Cover with foil and bake at 350 for about an hour. Serve with rice, pasta etc... Eat & Enjoy!

Happy Cooking & Eating!

~Nikko

--

Tuesday, December 22, 2009

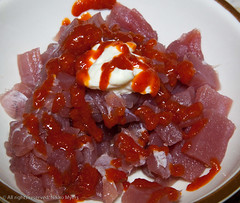
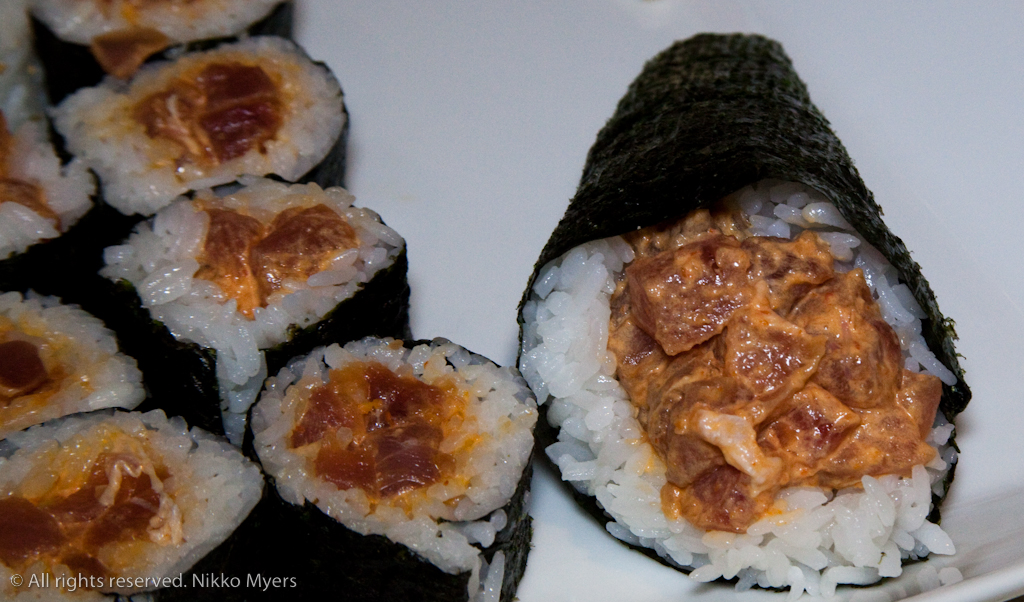
Spicy Tuna Roll


Lisa's favorite roll is the Spicy Tuna Roll... I like them too - spicy is good! Making sushi rolls at home is pretty easy. You need to practice making the sushi rice (that's another post on here) for that is base of all sushi.

Ahi Tuna, diced
1 tsp mayo - you can omit this if you don't want it but it helps everything hold together
1 tsp Sriracha hot sauce - more or less depending on your taste - I like more

Dice your tuna and put it in a bowl. Put in a spot of mayo and the Sriracha hot sauce; mix it all together well. Be careful when you mix because we do not to smash the tuna... Once you have everything mixed up give a small piece a taste to make sure everything is good for you.

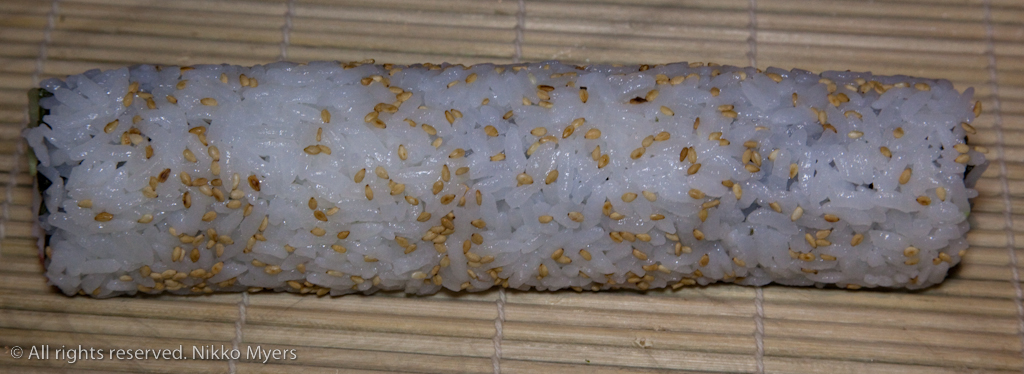
Prepare your nori and rice like you would for any standard roll. Lay down a nice row of your prepared tuna. Roll it up and slice - some say you have to have an odd number of slices and some say even is ok. Whatever you decide to do just make sure all your pieces are even. Sushi is pretty food so make sure it looks good...

Happy Cooking & Eating!

~Nikko


--

Saturday, December 19, 2009

Foodie Thoughts

"I drive way too fast to worry about cholesterol." -- Steven Wright.

Friday, December 18, 2009

Sushi - Crunchafornia Roll


I tried something new last night and came up with The Crunchafornia Roll... A twist on the standard California Roll. I proved the concept last night and will have photos and a video up soon. I made it two ways - the first was to make your standard California Roll then dust it in corn starch then dunk it into a tempura batter then fry the whole thing. The second way I did it was just to take the crab sticks and tempura them and put them into the normal California roll. Both ways were good. I'm going to be doing them again and have some people over to see which version wins the taste test...

Happy Cooking & Eating!

~Nikko

Thursday, December 17, 2009

Sushi Rice

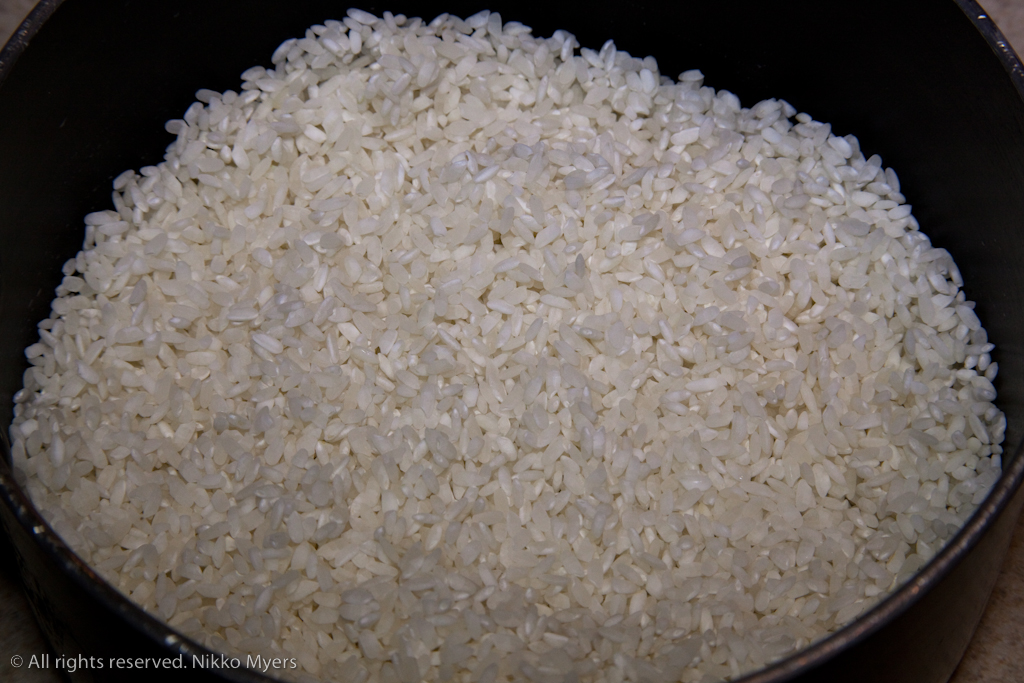
I've made sushi with long grain rice - it is possible, but I would suggest finding a short grain rice to use. I get mine at the Asian market and I think it's well worth it. I use Nishiki sushi rice - it works for me...

Making sushi rice is a process. There are directions on the bag, but if you follow mine you'll end up with perfect rice every time.

Just so you know 1.5 cups of sushi rice will turn into a bit over 6 cups of rice when it's cooked.

Rice:

1.5 Cups Sushi rice
2 Cups Water

Vinegar Solution:

2 Tbsp + 2 tsp Rice Vinegar
1 Tbsp + 1 1/2 tsp Sugar
1/2 tsp Salt

Take 1.5 cups of rice and put it in a fine mesh strainer. Run the rice under water until the water runs clear. You can do this in your pot as well. Put the rice in the pot and fill half way with water. Run your fingers through the rice and the water will become a milky color. Drain off the milky water and replace with fresh water. Keep doing this until the water is clear again. Once you get the rice washed drain it as well as you can, then let the rice sit undisturbed for 20 minutes. It's amazing how white it will become. Add the rice to a pot and put in the water. Cover and bring to a boil. Once you are on the boil reduce the heat to low and let cook for 20 minutes.

Once your 20 minutes is up you need to cool the rice down quickly. If you don't have one of those fancy wooden tubs - a large plate will work just fine. Carefully spread out the rice and start fanning it with a hand fan or I used a magazine... Fan the rice for a few minutes then sprinkle on the vinegar solution. Cut the vinegar into the rice - do not stir the rice slide your spoon or spatula through the rice to mix. You want the rice pieces to stay separated not a huge mushy mass... Continue to fan the rice while you are cutting through it. Turn the rice over and continue to fan. After about 5 minutes the rice should be ready to use. You can store the rice under a moist towel until you are ready to use. I like to put mine in a plastic bowl and cover it with a damp towel... You will need to moisten your hands before working with the rice. It's really sticky!

Sushi On!

~Nikko

Tuesday, December 15, 2009

Foodie Thoughts

Spices make the difference between food and cuisine. ~ Me

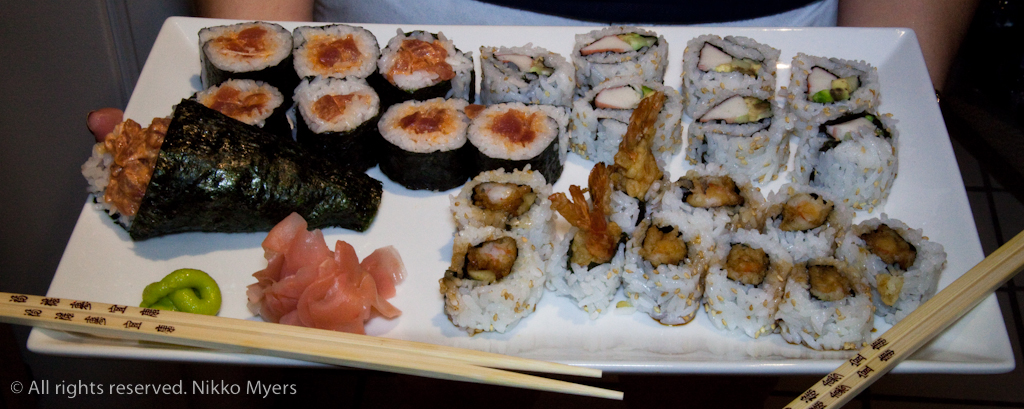
SUSHI - I'm a fan...


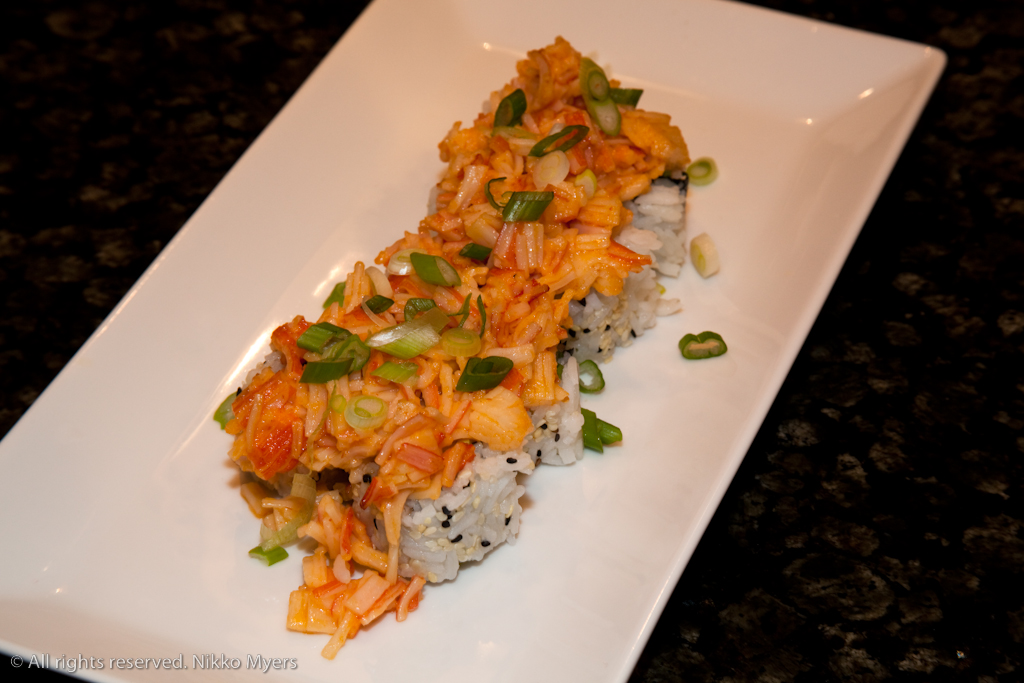
Last night's dinner. Spicy Tuna roll (and hand roll), California Roll, Shrimp Tempura. Thee will be posts coming soon showing you how to make each of these (and other) sushi rolls soon...

~Nikko

Monday, December 14, 2009

Dynamite Sushi Sauce


The best Dynamite Sauce I've ever had comes from a sushi house named Sushi Awaji in Plano Texas (suburb of Dallas). As far as I'm concerned Dallas has the the best sushi I've ever had and considering I live a stones throw from the Ocean (now) and Dallas is a land locked city - that kinda makes me mad... They have a dish called the Crawfish Volcano that will put a smile on your face. I've probably ordered a few hundred of them from Awaji and every one of them was amazing. I always compare every Dynamite Sauce to theirs - and most fail... I could never get their recipe out of them but after trying and trying this one comes really close.


All of these items can be found in any Asian market... If you can't find (or don't want to use) the Kewpie, Kraft or Hellman's will work - canola or lite mayo's won't...

1/2 cup Kewpie Mayo
2 Tbsp Sriracha
Sesame oil, just a few drops will do

Put all the ingredients in a bowl and mix well. That was hard wasn't it...

There are many uses for this sauce, but my main use is on top of a California roll in what I call a Shrimp Volcano Roll. I mix the sauce with diced cooked shrimp and broil it on a sheet of tin foil for a few minutes. Then I spoon it on top of the roll. It's good, it's very good - But that's another video...

Sushi on!

~Nikko

--

Thursday, December 10, 2009

Turkey Sausage Fusilli

This is one of the first dishes Lisa cooked for me. She's an amazing cook and I never go hungry... It's hard to believe this is so good given it's so simple, but simple food is usually the best! You can use regular sausage, but if you can find a good turkey sausage why add the extra calories. We get our turkey sausage form Publix - it's the best I've found...

3 Turkey sausage links, casing off and pulled into bite sized pieces
2 Cups Fusilli pasta, the ones that look like corkscrews
2 Red peppers, roasted and diced - can roast them yourself or out of a jar
1/2 Bag Spinach, washed and drained
1/2 Cup Chicken stock
1/4 tsp Red pepper flakes, more or less to your liking
1/2 tsp Oregano
Salt
Pepper

Start by preparing the pasta according to the package. While the pasta is cooking, remove the casings off the sausage and pull them into bite sized pieces. In a large saute pan cook the sausage over a medium heat until it is cooked through. Once the sausage has cooked, remove it to a bowl. Deglaze the pan with the chicken stock. Add the roasted red peppers, red pepper flakes, oregano, salt and pepper to the pan - Cook for 2 minutes. Add the spinach to the pan and cook down - this will take only a few minutes. When the spinach has cooked, add the sausage and drained pasta back to the pan and mix everything together well. Plate, Eat & Enjoy!

Happy Cooking & Eating!

~Nikko

--

Tuesday, December 8, 2009

Pancakes


I have two recipes I use for making pancakes. Both have been tried and trued over many years. The one here is the one that produces very good pancakes, and I share with anyone who asks for it - the other however falls into the secret files, and I'm not sharing...

1 1/2 Cups Flour
1/2 tsp salt
1 tsp Sugar
2 1/2 tsp Baking powder
1 Egg
1 Cup Milk
3 Tbsp Butter, melted and cooled, plus extra for cooking
Softened butter, for serving
Warmed Maple syrup, for serving

Sift the flour, salt, sugar, and baking powder into a large bowl. Whisk together the milk, egg, and butter in a small bowl. Make a well into the flour and add in the wet mixture. Whisk everything together well, but do not over mix. It shouldn't take you more than 30-40 strokes to bring it all together well. If there are a few lumps - leave them be they will work themselves out. Bring a griddle (or large saute pan) to a medium head and add a spot of butter. Once the butter has melted coat the bottom of the pan. It's always good to start with a test pancake to make sure your temperature is at the right level (this will vary per pan) - the good thing here is if it's good you can eat it, and if not give it to the dog... You can make your pancakes any size you want, but I almost always go with a 1/4 cup of batter. Once you have your batter in the pan just leave it alone until bubbles form on top and a few of them pop. Once they have popped it's time to flip. Carefully flip them over and cook the other side - this will not take as long as the first side. If you need to store them before serving put your oven on it's lowest serving and store them on a hotel pan under a towel until you're ready to serve. Serve with butter, jelly, syrup, etc... Eat & Enjoy!

Happy Cooking & Eating!

~Nikko

--

Monday, December 7, 2009

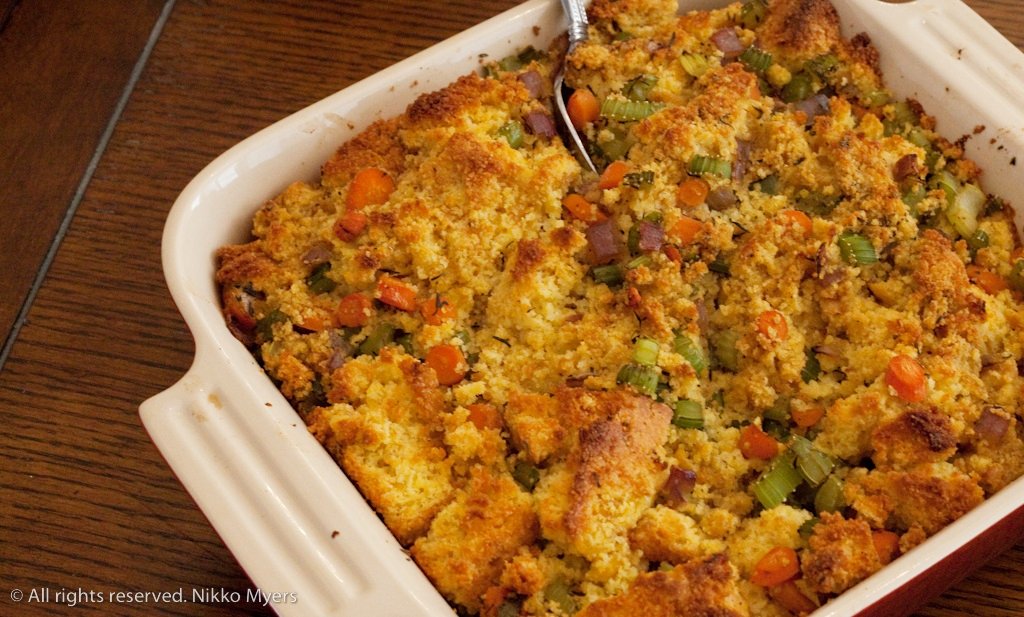
Cornbread Stuffing


So I made one homemade stuffing that knocked everyone's socks off so I thought I would try my hand at another. Cornbread stuffing has always been a favorite of mine and I'm glad I finally tried it. The only thing I would have done differently in this recipe would be to add some sausage to it.

1 Recipe for cream corn cornbread (http://cookingmywayvideo.blogspot.com/2009/11/creamed-corn-cornbread.html)
1 Cup Celery, diced
1 Cup Carrots, diced or sliced
1/2 Cup Red Onion, diced
2 Garlic Cloves, minced
Chicken Stock, enough to make it all nice and moist
2 Tbsp Butter
Thyme
Marjoram
Sage
Cayenne pepper, pinch
Chipotle pepper, pinch
Salt
Pepper

Start by prepping up the veg. Melt a few tablespoons of butter in a saute pan over medium heat. Add the veg and a healthy pinch of salt to start the sweating process. While the veg is doing its thing, cut the cornbread into inch or so cubes. Be careful when cutting the cornbread because it's quite delicate. Just like in the last stuffing recipe - For the seasoning - I'm going to ask you to add amounts of these that make you happy. Start by adding a heavy pinch of the thyme, marjoram, and sage, and a small pinch of the cayenne and chipotle. Start small and add until it gives you a smell that you like. Once mine started smelling like a nice stuffing mix I stopped. I probably ended up with a few teaspoons of each (a little heaver on the thyme but that's just because I love thyme). You will want to cook this for about 5 minutes or just until everything starts to get a bit soft. Add about a cup of chicken stock to the pan and let it warm up. Once finished add the the bread bowl and carefully fold everything together well. Add enough stock to moisten everything well. Once you have a happy mixture, put into a baking dish and bake at 350 for an hour.

Again next time I make this I'm going to add some nice country sausage to the mix. It was good as it was, but that would have made it a lot better...

Happy Cooking & Eating!

~Nikko
--